To test a dirt bike stator, use a multimeter to check the resistance between the stator’s wires and the ground.
Why Is Testing A Dirt Bike Stator Important?
Testing a dirt bike stator is an important part of regular maintenance for any dirt bike enthusiast. The stator is responsible for generating the electrical power needed to ignite the spark plug and keep the bike running smoothly. Problems with the stator can lead to a variety of issues, including poor performance, breakdowns, and even permanent damage to the bike’s electrical components. By regularly testing the stator, you can ensure optimal performance, avoid potential breakdowns, and extend the lifespan of your dirt bike.
Ensuring Optimal Performance
Regularly testing the dirt bike stator is essential for ensuring optimal performance. The stator plays a crucial role in generating the electrical power that is needed to ignite the spark plug and keep the engine running smoothly. If the stator is faulty or has issues, it can result in a weak spark or no spark at all, leading to poor engine performance. By testing the stator regularly, you can identify any potential problems early on and take appropriate measures to address them, ensuring that your dirt bike continues to run at its best.
Avoiding Potential Breakdowns
A faulty dirt bike stator can easily lead to unexpected breakdowns while you’re out on a ride. When the stator doesn’t generate enough power, the bike’s electrical system may not be able to keep up with the demands of the engine. This can result in the battery running low or dying completely, leaving you stranded with a bike that won’t start. By testing the stator regularly and addressing any issues, you can prevent potential breakdowns and ensure that your dirt bike is always ready for your adventures.
Extending the Lifespan of Your Dirt Bike
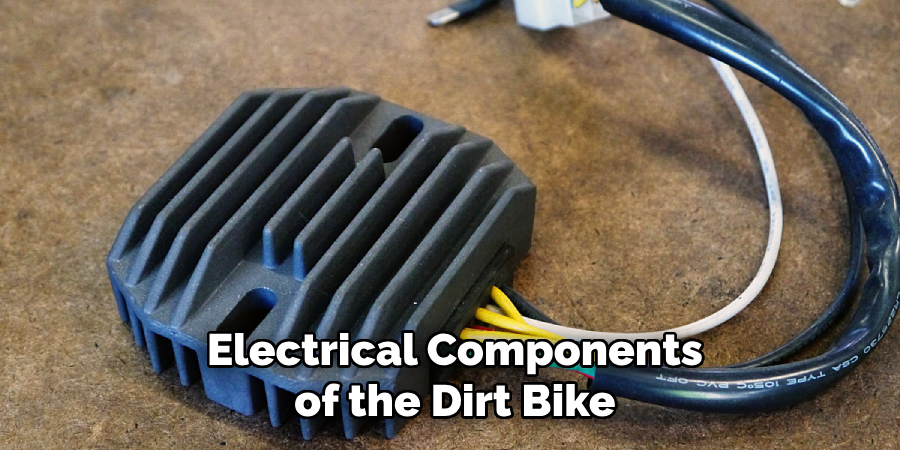
Regularly testing the dirt bike stator is not only about performance and avoiding breakdowns, but it also helps to extend the overall lifespan of your beloved machine. A faulty stator can cause damage to other electrical components of the dirt bike, such as the regulator/rectifier or the CDI unit. By catching and repairing any stator issues early on, you can prevent damage to these expensive components and ensure that your dirt bike lasts for many years to come. Testing and maintaining the stator is a proactive measure that can save you time, money, and frustration in the long run.
By understanding the importance of testing a dirt bike stator, you can prioritize this essential maintenance task and ensure that your bike performs at its best, avoids potential breakdowns, and has a longer lifespan. Regular stator testing is a small investment of time and effort that yields significant returns in terms of performance, reliability, and peace of mind on your dirt bike adventures.
Tools And Equipment Needed For Testing A Dirt Bike Stator
Testing a dirt bike stator is an essential step in diagnosing electrical problems in your bike’s engine. To properly test the stator, you will need a few tools and equipment to ensure accurate results. Here are the key tools you will need:
Multimeter
A multimeter is the most crucial tool for testing a dirt bike stator. This device measures several electrical values such as voltage, current, and resistance. By using a multimeter, you can measure the output of the stator and determine if it is functioning properly. Make sure to set the multimeter to the appropriate settings for the specific test you are conducting.
Safety Gloves
Safety should always be a priority when working with electrical components. Before testing the stator, it is essential to wear safety gloves to protect your hands from potential hazards. The gloves should be made of non-conductive material to prevent electric shocks and ensure your safety while handling the wires and electrical connections.

Screwdriver
A screwdriver is necessary for accessing the stator within the dirt bike’s engine. It allows you to remove the necessary bolts or screws to gain access to the stator. Additionally, a screwdriver can also be useful for making any necessary adjustments or repairs to the stator during the testing process.
Wire Stripper
A wire stripper is a handy tool for safely removing the insulation from wires. When testing a dirt bike stator, you may need to expose the wires to get accurate readings. A wire stripper enables you to remove the insulation without damaging the wires, allowing for accurate testing and analysis of the stator’s output.
These tools and equipment are essential for properly testing a dirt bike stator. By ensuring you have the necessary tools and taking the appropriate safety precautions, you can confidently diagnose any electrical issues with your dirt bike’s stator and make the necessary repairs.
Step-By-Step Guide To Test A Dirt Bike Stator
Are you experiencing electrical issues with your dirt bike? One potential cause could be a faulty stator. The stator is an important component of your bike’s electrical system, responsible for generating power to charge the battery and power the electrical components. If you suspect that your stator is defective, it’s important to test it properly to determine the issue. In this step-by-step guide, we will walk you through the process of testing a dirt bike stator, helping you identify any problems and troubleshoot them effectively.
Preparing the Dirt Bike
Before we begin testing the stator, it’s important to prepare your dirt bike for the process. Make sure your bike is parked on a flat, level surface and the engine is turned off. Disconnecting the battery is crucial to avoid any electrical shocks or damage, so start by locating the battery and disconnecting it.
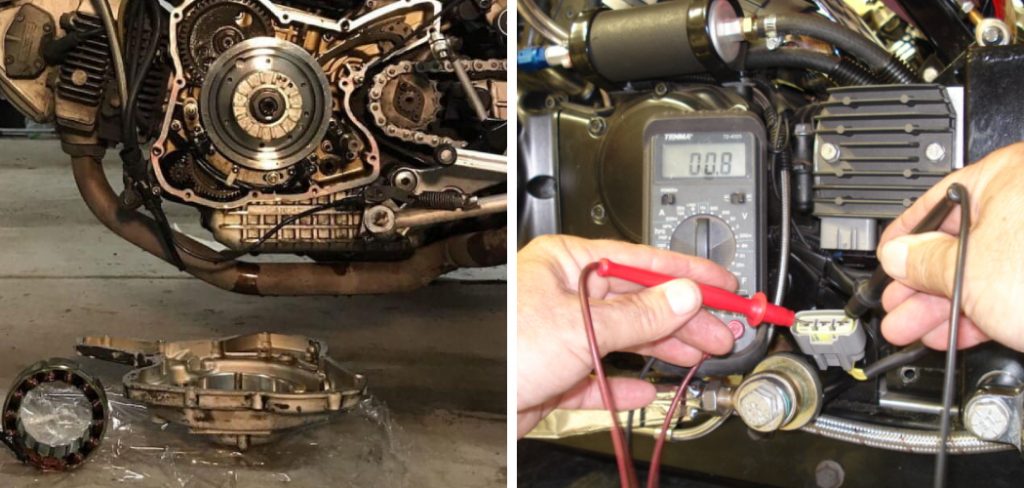
Locating the Stator
Next, you’ll need to locate the stator on your dirt bike. The stator is typically located on the left side of the engine, behind a stator cover. Consult your bike’s manual if you’re unsure about its exact location. Once you’ve located the stator, you can proceed with testing it.
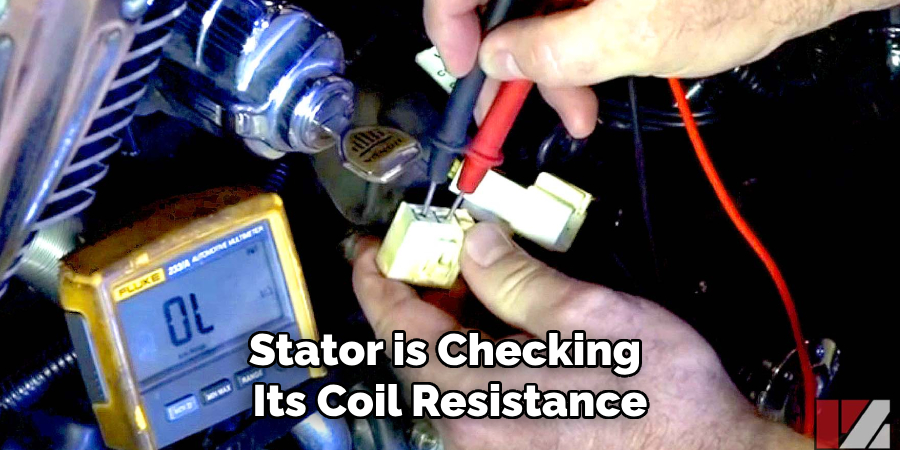
Testing the Stator Coil Resistance
The first step in testing the stator is checking its coil resistance. To do this, you’ll need a multimeter set to measure resistance. Remove the stator cover to gain access to the stator coil. Identify the stator coil wires and connect the multimeter probes to them according to your bike’s specific wiring diagram. With the multimeter set to resistance mode, measure the resistance of each coil by touching the probes to the appropriate wires.
Testing the Stator Coil Continuity
Continuity testing is essential to ensure that there are no breaks or interruptions in the stator coil. Set your multimeter to continuity mode and check for continuity between the coil wires. If there is no continuity between any of the wires, it indicates a problem with the stator coil that needs to be addressed.
Testing the Stator Output Voltage
Now it’s time to assess the stator’s output voltage. Connect the multimeter to the stator according to the wiring diagram and set it to measure AC voltage. Start the dirt bike and let it run at idle speed. Measure the stator output voltage by touching the multimeter probes to the appropriate wires. Take multiple readings at different RPMs to get a more accurate picture of the stator’s performance.
Interpreting the Test Results
Once you’ve completed the tests, it’s crucial to interpret the results correctly. Compare the resistance and continuity values to the manufacturer’s specifications for your specific dirt bike model. If the values are significantly outside the acceptable range, it indicates a problem with the stator that needs to be addressed.
Troubleshooting Common Stator Problems
If you’ve identified a faulty stator, it’s important to understand which components may be causing the issue. Common stator problems can stem from damaged wires, insulation failure, or a malfunctioning voltage regulator. Carefully inspect these components for any signs of damage or wear and replace them if necessary.
By following this step-by-step guide, you can effectively test your dirt bike stator and diagnose any potential issues. Remember, if you’re unsure about performing these tests yourself, it’s always best to consult a professional mechanic for assistance. Proper maintenance and testing will ensure your dirt bike’s electrical system is in top condition, allowing you to enjoy a smooth and trouble-free ride.
Tips For Maintaining A Healthy Dirt Bike Stator
Proper maintenance of a dirt bike stator is essential to ensure its optimal functionality and longevity. Regular inspections and cleaning, proper storage techniques, avoiding overloading the electrical system, and timely repairs and replacements of damaged components are key to maintaining a healthy dirt bike stator.
Regular inspections and cleaning
Regular inspections and cleaning of the dirt bike stator are necessary to identify and prevent potential issues. Regularly inspect the stator for any signs of damage, such as corrosion or worn-out wires. Additionally, check the connections to ensure they are secure and free from debris. Cleaning the stator can be done using a soft brush or compressed air to remove dust and dirt from the surface. It is important to handle the stator with care and avoid using excessive force during cleaning to avoid causing further damage.
Proper storage techniques
Proper storage techniques play a crucial role in maintaining a healthy dirt bike stator. When not in use, ensure the bike is stored in a dry and well-ventilated area to prevent moisture buildup. Moisture can lead to corrosion and damage the stator. It is also important to store the bike in a cool and temperature-controlled environment to minimize the risk of excessive heat affecting the stator and other electrical components.
Avoiding overloading the electrical system
One of the main causes of stator failure is overloading the electrical system. Avoid connecting additional accessories or devices that draw excessive power from the stator. Overloading can lead to overheating and premature stator failure. Always ensure that the electrical load on the dirt bike’s stator is within the manufacturer’s recommended limits. This can help prevent unnecessary stress and prolong the life of the stator.
Timely repairs and replacements of damaged components
To maintain a healthy dirt bike stator, it is vital to address any damaged components promptly. Regularly inspect the stator and its associated components for signs of wear and tear. If any damage is detected, it is important to repair or replace the component as soon as possible. Ignoring damaged components can lead to further damage and compromise the stator’s overall performance. Ensuring timely repairs and replacements will help keep the stator in good working condition and extend its lifespan.
Frequently Asked Questions Of How To Test A Dirt Bike Stator
How Do You Test A Stator With A Multimeter?
To test a stator with a multimeter, follow these steps: 1. Set your multimeter to the AC voltage setting. 2. Disconnect the stator from the electrical system. 3. Connect the multimeter probes to the stator terminals. 4. Start the engine and rev it up, then check the multimeter for voltage output.
How Can I Tell If My Stator Is Bad?
To determine if your stator is bad, look for signs such as a weak or dead battery, inconsistent or weak spark from the ignition system, or difficulty starting the engine.
How Do You Test A Motorcycle Stator With A Multimeter?
To test a motorcycle stator with a multimeter: 1. Set the multimeter to the resistance mode. 2. Connect the positive and negative leads to the stator wires. 3. Check the resistance readings against the manufacturer’s specifications. 4. If the readings are out of range, the stator may need to be replaced.
Will A Dirtbike Run With A Bad Stator?
Yes, a dirtbike can run with a bad stator, but it may cause issues with starting and powering electrical components.
Conclusion
To ensure the smooth functioning of your dirt bike, it is crucial to test the stator. By following the step-by-step guide mentioned in this blog post, you can easily determine whether your stator is functioning properly or not. Begin by performing a visual inspection to look for any signs of damage or wear.
Next, use a multimeter to check the resistance of the stator’s coils. Compare the readings with the specifications provided by the manufacturer. Uncover any discrepancies and address them accordingly. Additionally, test the stator’s output voltage to ensure it is within the recommended range.
Regularly testing your dirt bike stator will not only save you from any unexpected breakdowns but also prolong the lifespan of your bike’s electrical system. By taking the time to properly test your dirt bike stator, you can enjoy a hassle-free and smooth riding experience.