To install a slip-on exhaust, first, remove the stock muffler from the motorcycle’s exhaust system, then attach the slip-on exhaust by sliding it onto the exhaust pipe and securing it with clamps or mounting brackets. Ensure that the exhaust is aligned properly before tightening the bolts or clamps.
Upgrading your motorcycle’s exhaust system can enhance its performance and produce a more pleasing sound. One popular option is installing a slip-on exhaust, which is a relatively simple and cost-effective modification. This article will guide you through the step-by-step process of installing a slip-on exhaust, ensuring that you can enjoy the benefits of this upgrade without any hassle.
By following these instructions and preparing the necessary tools, you’ll be able to complete the installation quickly and enjoy the improved performance and sound of your motorcycle. So, let’s get started with the installation process and bring a new level of excitement to your riding experience.

Credit: www.amazon.com
How to Install Slip on Exhaust: Step by Step Guide
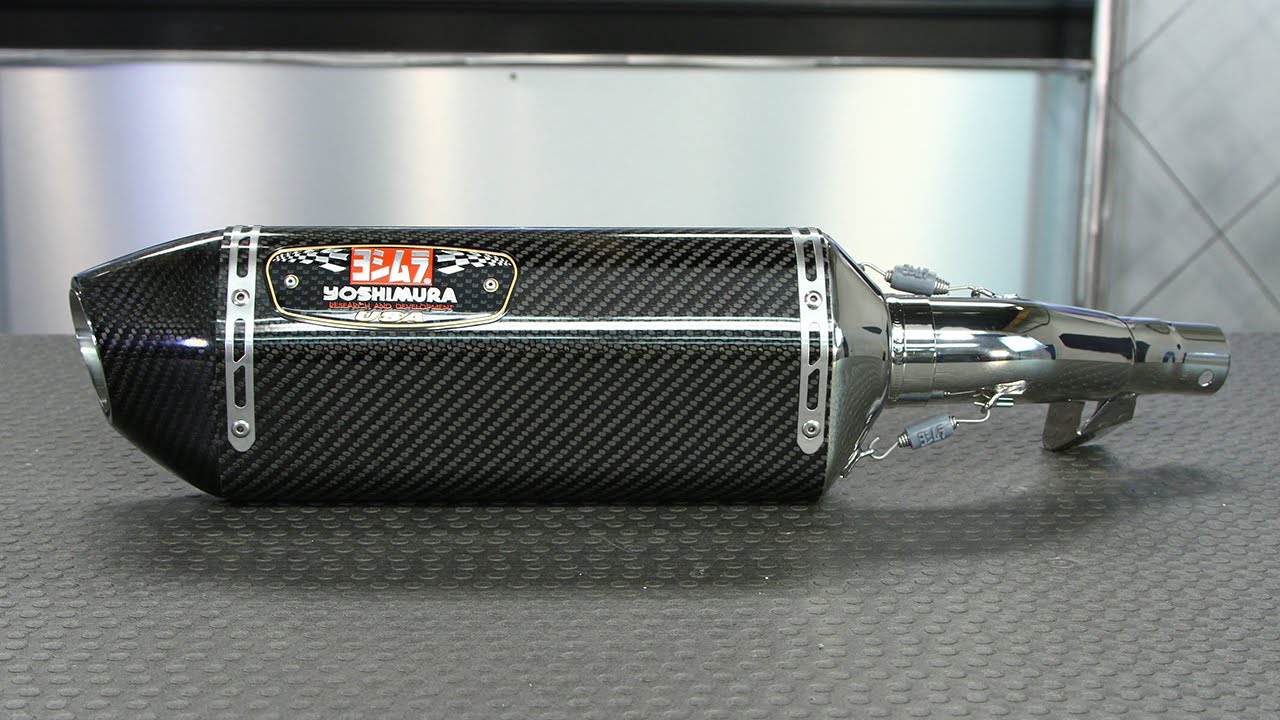
Choosing The Right Slip On Exhaust
Installing a slip on exhaust can be a great way to enhance the performance and style of your motorcycle. But before you start, it’s important to choose the right slip on exhaust for your needs. Consider the following factors to make an informed decision:
| Benefits of Slip on Exhaust Systems |
| • Enhanced performance |
| • Improved sound and style |
| • Easy installation |
| • Cost-effective |
Factors to Consider when Selecting a Slip on Exhaust
- Performance Improvements: Look for an exhaust that offers increased horsepower and torque for a noticeable boost in your bike’s performance.
- Material and Durability: Opt for high-quality materials like stainless steel or carbon fiber that provide durability and resistance to corrosion.
- Sound and Style: Consider the sound and aesthetics of the exhaust system, ensuring it complements your motorcycle’s overall look and produces the desired sound.
- Budget and Cost: Take into account your budget, considering both the initial cost of the exhaust system and potential maintenance expenses.
By carefully analyzing these factors, you can choose the right slip on exhaust that meets your performance, style, and budget requirements.
Preparing For The Installation
Safety Precautions before Installing Slip on Exhaust:
- Gather the necessary tools and equipment for the installation.
- Ensure proper ventilation in the workspace to prevent fumes and gases.
- Secure the motorcycle or vehicle on a stable stand or lift.
- While removing the stock exhaust, wear protective gloves and goggles.
- Locate and disconnect the exhaust clamps or bolts holding the exhaust in place.
- Detach the exhaust pipes from the engine carefully to avoid any damage.
By following these safety precautions, you can successfully prepare for the installation of a slip on exhaust. Make sure to gather the necessary tools, provide proper ventilation, secure the vehicle, and follow the correct steps for removing the stock exhaust.
Installing The Slip On Exhaust
Installing a slip-on exhaust on your motorcycle or vehicle is a straightforward process that can enhance your riding experience. Before starting the installation, it’s essential to prepare the slip-on exhaust properly.
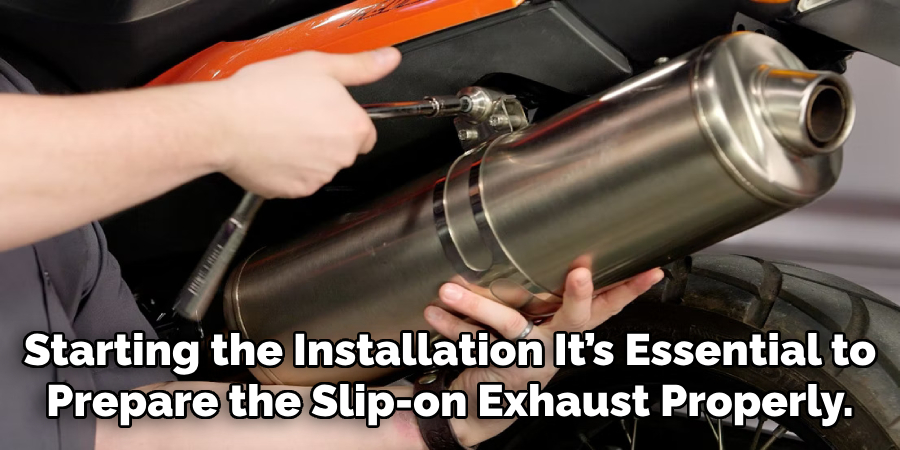
First, ensure that the slip-on exhaust you have purchased is the correct fit for your motorcycle or vehicle. Check the manufacturer’s guidelines or consult with a professional to determine the right fitment.
Next, apply a heat-resistant paste or sealant to the mating surfaces of the slip-on exhaust. This will help create a tight seal and prevent exhaust leaks.
Once the preparation is complete, attach the slip-on exhaust to your motorcycle or vehicle. Align the slip-on exhaust with the header pipes, ensuring a proper connection.
Finally, tighten the clamps or bolts securely to ensure a stable installation. This will prevent any rattling or movement while you’re riding.
By following these steps, you can successfully install a slip-on exhaust, giving your motorcycle or vehicle a new and improved sound and performance.
Post-Installation Steps
After successfully installing a slip-on exhaust, there are a few post-installation steps that you should follow to ensure everything is in proper working order. Start by inspecting the installed slip-on exhaust, checking for any visible damage or misalignment.
Next, verify that the slip-on exhaust is properly aligned and positioned on the motorcycle or vehicle. Ensure that all connections are secure and tightened properly to prevent any potential leaks or issues.
Once you have inspected and verified the installation, it’s time to test the slip-on exhaust. Start the motorcycle or vehicle and listen carefully for any exhaust leaks or abnormal sounds.
Finally, evaluate the performance improvements by taking the motorcycle or vehicle for a short test ride. Pay attention to any changes in acceleration, throttle response, or overall sound.
By following these post-installation steps, you can ensure that your slip-on exhaust is installed correctly and functioning optimally. Enjoy the enhanced performance and sound!
Troubleshooting Common Issues
Exhaust leaks can be a frustrating issue when installing slip-on exhaust. Here are some tips to help you deal with them:
Identifying Potential Leak Points:
Inspect the joints between the exhaust pipe and the slip-on carefully to identify any potential leak points. Check for gaps, loose connections, or damaged gaskets.
Applying Appropriate Solutions:
If you find any leak points, apply high-temperature silicone sealant or exhaust putty to seal them properly. Ensure that the sealant is resistant to extreme temperatures and provides a reliable seal.
Addressing Fitment Issues:
Fitment issues can also lead to exhaust leaks. Ensure that the slip-on exhaust is compatible with your motorcycle’s make and model. Make adjustments or consider getting a different slip-on if needed.
Adjusting the Slip-on Exhaust Position:
Sometimes, incorrect positioning of the slip-on can cause leaks. Ensure that it is properly aligned and securely tightened. Make adjustments as necessary to eliminate any gaps.
Seeking Professional Assistance:
If you’ve tried troubleshooting the issues but still can’t resolve the exhaust leaks, it may be best to seek professional assistance. An experienced mechanic can help identify the root cause and provide a suitable solution.
Remember to follow these steps carefully when installing a slip-on exhaust to avoid common issues and enjoy a well-performing system.
Maintaining And Extending The Lifespan Of Slip On Exhaust
Slip on exhausts can greatly enhance the performance and sound of your vehicle. To ensure they last as long as possible, proper maintenance is crucial. Cleaning and polishing the slip on exhaust regularly is a fundamental step. By removing surface dirt and debris, you prevent potential damage caused by corrosion and grit. Applying cleaning products specifically recommended for exhaust systems will help maintain its appearance and functionality.
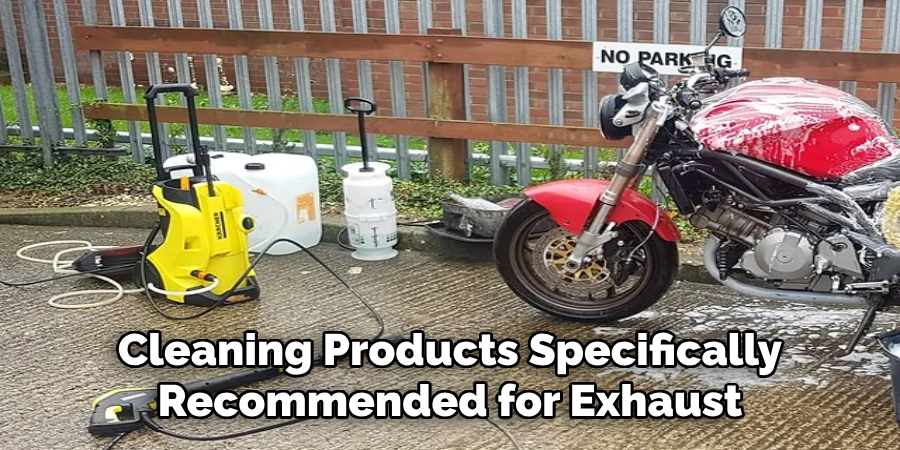
Additionally, conducting regular inspections enables early detection of any loose or damaged parts. If identified, these parts should be either tightened or replaced as necessary. Components that have become worn-out or rusty should also be promptly replaced to avoid performance issues.
Frequently Asked Questions On How To Install Slip On Exhaust
How Do Slip-On Exhausts Work?
Slip-on exhausts work by replacing the stock muffler and improving the airflow of the exhaust system. They are designed to increase horsepower and torque, enhance the exhaust note, and reduce overall weight.
Can I Install Slip-On Exhaust By Myself?
Yes, you can install a slip-on exhaust by yourself if you have basic mechanical skills and the necessary tools. The process usually involves removing the old muffler, sliding the slip-on exhaust into place, and securing it with clamps or bolts.
However, if you’re unsure, it’s always best to consult a professional or refer to the manufacturer’s instructions.
What Are The Benefits Of Installing Slip-On Exhaust?
Installing a slip-on exhaust offers several benefits, including improved performance, enhanced aesthetics, and a deeper, more aggressive exhaust sound. They also provide weight reduction, better heat dissipation, and increased fuel efficiency. Additionally, slip-on exhausts are often more affordable than a full system and can be easily customized to suit your preferences.
Conclusion
Installing a slip-on exhaust is a simple and effective way to enhance your motorcycle’s performance and give it a unique, aggressive sound. By following the step-by-step instructions outlined in this blog post, you’ll be able to install your slip-on exhaust with ease.
Remember to always take safety precautions and consult your motorcycle’s manufacturer for specific guidelines. Enjoy the enhanced power and sound that a slip-on exhaust brings to your ride!