To clean the carb on a dirt bike, first, remove the carburetor from the bike. Then, use carburetor cleaner to remove any dirt or debris from the carburetor’s components.

Credit: www.youtube.com
Understanding The Importance Of Carburetor Maintenance
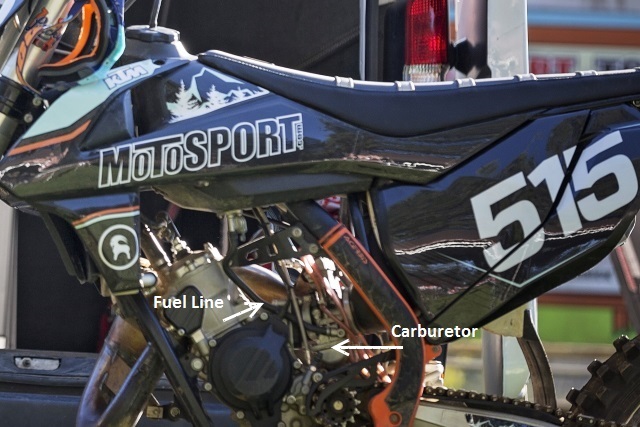
Regular cleaning of the carburetor is crucial for maintaining optimal performance on a dirt bike. The carburetor plays a significant role in the functioning of a dirt bike, as it controls the air and fuel mixture needed for combustion. Over time, dirt, debris, and varnish can accumulate in the carburetor, leading to clogging and affecting the bike’s overall performance. By cleaning the carburetor regularly, you can ensure that it remains free from any blockages and operates smoothly.
Cleaning the carburetor involves disassembling the various components and using carburetor cleaner to remove any built-up deposits. It is essential to follow the manufacturer’s instructions and use the appropriate cleaning tools. Regular carburetor maintenance not only improves fuel efficiency but also extends the lifespan of the dirt bike. Neglecting carburetor cleaning can result in engine problems, difficulty starting the bike, and reduced power output. Proper maintenance of the carburetor is essential for dirt bike enthusiasts who want to enjoy optimal performance and reliability on their rides.
| Benefits of regular carburetor cleaning: |
|
How to Clean Carb on Dirt Bike: Step by Step Guide
Preparing For Carburetor Cleaning
Carburetor cleaning is an essential task when maintaining a dirt bike. Before starting the cleaning process, it’s crucial to gather the necessary tools and materials for a smooth and efficient procedure.
Firstly, make sure to have the following tools at your disposal:
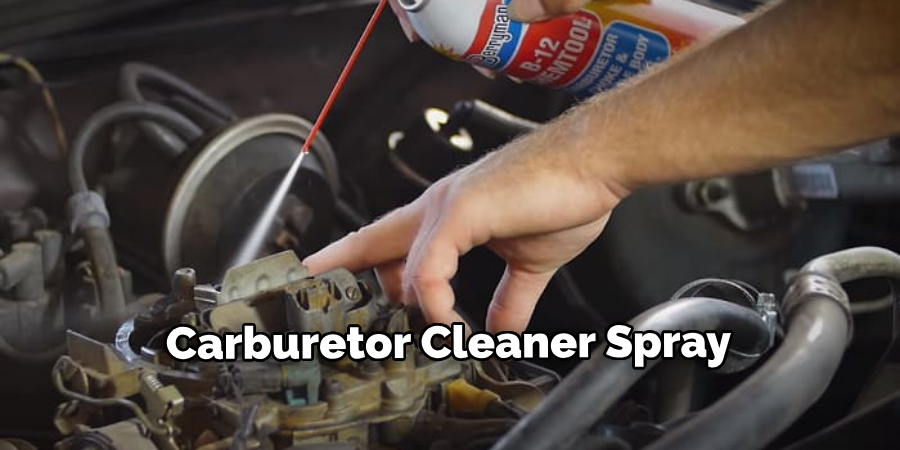
- Carburetor cleaner spray
- Small wire brush
- Clean cloth or paper towels
- Screwdriver set
- Adjustable wrench
- Compressed air can or air compressor
In addition to the aforementioned tools, gather these materials:
- Gloves and safety goggles for protection
- A clean and well-ventilated work area
- A replacement gasket for the carburetor (if needed)
Another important step before cleaning the carburetor is adjusting the bike to ensure easy access to the carburetor itself. Place the dirt bike on a sturdy stand or lift for stability. This will allow for proper visibility and comfort during the cleaning process.
By following these preparations, you’ll be well-equipped and ready to efficiently clean the carburetor of your dirt bike. Stay tuned for the next steps on how to clean the carburetor!
Disassembling The Carburetor
Disassembling the carburetor is an essential step in cleaning the carb on your dirt bike. Start by removing the air filter, which can be done by loosening the clamps and sliding it off. Next, disconnect the throttle cable by loosening the lock nut and sliding the cable out of the carburetor. To take apart the float bowl, unscrew the bolts or screws that hold it in place and carefully lift it off.
Once the float bowl is removed, you can access the jets by unscrewing them with a jet wrench or a flathead screwdriver. Remember to pay attention to the order in which the jets are installed for reassembly. Cleaning the carburetor thoroughly will help improve the performance of your dirt bike and prevent any potential issues caused by clogged or dirty carburetor components.
Cleaning The Carburetor Components
When it comes to cleaning the carburetor components of your dirt bike, it is important to use a carburetor cleaner to effectively remove dirt and debris. Start by disassembling the carburetor and separating the components.
Using a carburetor cleaner, spray it on the various parts of the carburetor, focusing on the jets, valves, and passages. This will help remove any built-up grime and dirt that may be obstructing the fuel flow.
For thorough cleaning, consider soaking the carburetor parts in a cleaning solution. This can help dissolve any stubborn debris that the cleaner may not have removed completely. Ensure that you follow the instructions provided by the manufacturer of the cleaning solution for the appropriate soaking duration.
After soaking, rinse the parts thoroughly with clean water to remove any residue from the cleaning solution. Use compressed air or a can of carburetor cleaner to blow out any remaining debris from the small holes and passages.
Finally, carefully reassemble the cleaned carburetor components and reinstall them onto your dirt bike. Double-check all connections and ensure everything is properly tightened before starting up your bike.
| 1. Disassemble the carburetor and separate the components. |
| 2. Use a carburetor cleaner to spray and remove dirt and debris. |
| 3. Consider soaking the parts in a cleaning solution for thorough cleaning. |
| 4. Rinse the parts with clean water to remove any residue. |
| 5. Blow out remaining debris with compressed air or carburetor cleaner. |
| 6. Reassemble and reinstall the cleaned carburetor components. |
Inspecting And Reassembling
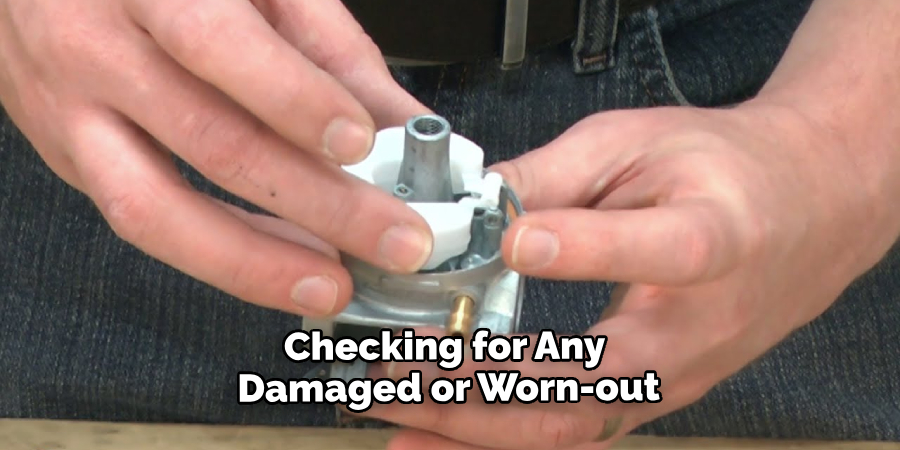
Inspecting and reassembling the carburetor on your dirt bike is an essential part of maintenance. Start by checking for any damaged or worn-out parts, such as the float, needle valve, or diaphragm. Replace any components that show signs of wear or damage.
Once you’ve finished inspecting the carburetor, carefully put it back together. Begin by reassembling the float bowl, making sure to position the gasket correctly. Then, insert the needle valve and attach the float. Ensure that all parts are securely fastened and properly aligned.
Reinstalling The Carburetor
The process of reinstalling the carburetor on a dirt bike involves properly aligning and securing it on the bike to ensure optimal performance. Start by carefully aligning the carburetor with the mounting studs on the engine intake manifold. Tighten the mounting bolts or screws securely using a suitable wrench or screwdriver, making sure not to overtighten. This will prevent any air leaks which can affect the bike’s running.
Once the carburetor is securely in place, reattach the air filter and throttle cable. Ensure that the air filter is clean and in good condition, as a clogged or dirty filter can restrict airflow and affect the bike’s performance. Reconnecting the throttle cable correctly is crucial for smooth acceleration and proper control.
By following these steps, you can successfully reinstall the carburetor on your dirt bike and ensure that it functions optimally, providing the efficiency and power needed for an enjoyable ride.
Testing And Adjustments
When cleaning the carburetor on your dirt bike, it’s important to properly test and adjust it for optimal performance. After cleaning and reassembling the carburetor, start the bike and check for smooth operation. Ensure that the engine idles smoothly and responds well to the throttle. Test it under different conditions, such as at different speeds and while accelerating or decelerating. Pay attention to any hesitations or surges in the engine’s performance as these could indicate a need for further adjustments.
Fine-tuning the carburetor is crucial for maintaining the bike’s overall performance. Make small adjustments to the idle screw and air/fuel mixture screw to achieve the optimal balance between fuel and air flow. Keep in mind that different bikes may require slightly different adjustments, so consult your bike’s manual or seek the guidance of a professional if needed. Once you are satisfied with the carburetor’s performance, reassemble any removed parts and enjoy a smoothly running dirt bike for your next ride.
Tips And Tricks For Carburetor Maintenance
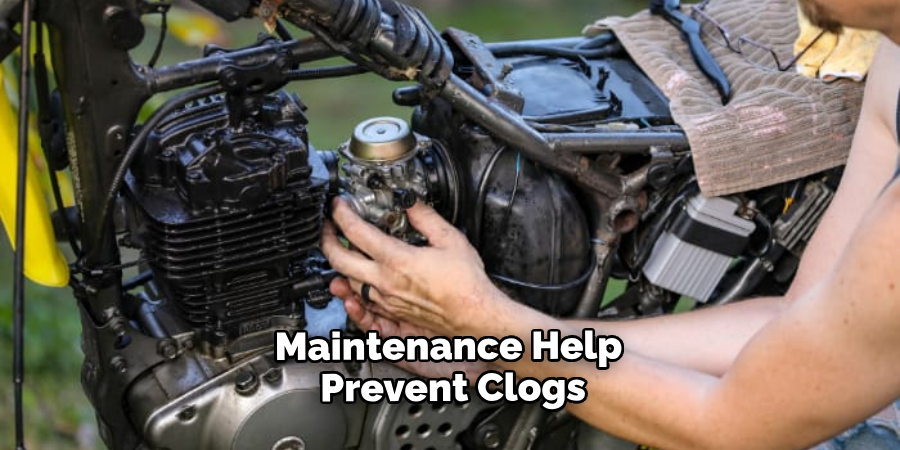
A clean and well-maintained carburetor is essential for keeping your dirt bike running smoothly. Regular cleaning and maintenance can help prevent clogs, improve performance, and prolong the lifespan of your carburetor. It is recommended to follow a cleaning schedule and frequency to ensure optimal functioning.
Here are some tips and tricks to keep your carburetor clean and functional:
- Regular Cleaning Schedule: Set a regular cleaning schedule based on your dirt bike usage. For frequent riders, cleaning every few weeks may be necessary, while occasional riders can clean their carburetor every few months.
- Preventive Measures: Take preventive measures to keep dirt and debris out of your carburetor. Use a fuel filter to trap particles and prevent them from entering the carburetor. Additionally, ensure the air filter is clean and in good condition.
- Thorough Cleaning: When cleaning the carburetor, disassemble it carefully and clean each component using carburetor cleaner. Be sure to remove any clogs or residue that may have accumulated.
- Inspect and Replace Parts: Regularly inspect the carburetor for any signs of wear or damage. Replace worn-out gaskets, seals, or jets to maintain optimal performance.
- Proper Storage: If you plan on storing your dirt bike for an extended period, empty the fuel tank and run the engine until it stops to prevent fuel residue from clogging the carburetor.
- Professional Help: If you are unsure about cleaning the carburetor yourself, it is recommended to seek professional help. They have the expertise and experience to ensure a thorough cleaning.
By following these tips and tricks, you can keep your dirt bike’s carburetor clean and functioning at its best, ensuring a smooth and enjoyable riding experience.
Common Mistakes To Avoid During Carburetor Cleaning
When it comes to cleaning the carburetor on your dirt bike, there are common mistakes that you should avoid. One of these mistakes is overlooking critical steps in the disassembling or cleaning process. It is important to carefully follow the manufacturer’s instructions and make sure you don’t skip any necessary steps.
Additionally, incorrect reassembly and adjustments can lead to performance issues. Make sure to take your time and properly reassemble the carburetor, ensuring all components are in the correct place and adjusted according to the specifications. This will help optimize the performance of your dirt bike and prevent any potential issues.
Troubleshooting Carburetor Problems
When it comes to troubleshooting carburetor problems on a dirt bike, it is essential to be able to identify common signs of issues. This can help you diagnose and address potential problems with the carburetor. Some common signs of carburetor issues include rough idle, difficulties with acceleration, and erratic or surging engine performance.
To diagnose the problem, you can start by checking the fuel system to ensure there is no blockage or contamination. Next, inspect the air filter to make sure it is clean and not restricting airflow. You may also need to adjust the idle and mixture screws on the carburetor to achieve proper air-fuel mixture.
Additionally, inspect the carburetor for any visible signs of damage or wear, such as loose or damaged hoses, gaskets, or diaphragms. Cleaning the carburetor’s internal components using a carburetor cleaner can often resolve issues caused by dirt or debris.
In conclusion, understanding how to identify common signs of carburetor problems and following proper diagnostic steps can help you successfully clean the carburetor on your dirt bike.
Frequently Asked Questions Of How To Clean Carb On Dirt Bike
How Often Should I Clean The Carburetor On My Dirt Bike?
It is recommended to clean your dirt bike’s carburetor every 6 months or after every 15-20 hours of riding. Regular cleaning ensures optimal performance and prevents issues like poor fuel efficiency and engine sputtering.
What Tools Do I Need To Clean The Carburetor?
To clean the carburetor on your dirt bike, you will need a screwdriver, carburetor cleaner, compressed air can, small wire brush, and a clean rag. These tools will help you remove and clean the carburetor components effectively.
How Can I Clean The Carburetor On My Dirt Bike?
To clean the carburetor, start by removing it from the dirt bike. Then, disassemble it carefully and soak the parts in carburetor cleaner. Use a small wire brush to scrub away any residue or buildup. Finally, rinse the parts with clean water, dry them thoroughly, and reassemble the carburetor.
Can I Clean The Carburetor Without Removing It?
While it is possible to clean some parts of the carburetor without removing it, it is generally recommended to remove the carburetor for a more thorough cleaning. This allows you to access all the components and ensure that there is no debris or buildup affecting the carburetor’s performance.
Conclusion
Cleaning the carburetor on your dirt bike is an essential maintenance task that ensures smooth performance. By following the step-by-step process outlined in this guide, you can easily clean your carburetor and keep your dirt bike running at its best.
Regular maintenance not only enhances the bike’s performance but also extends its lifespan. So, make sure to clean the carburetor regularly and enjoy a dirt bike experience like no other.