
To adjust the front brake on a dirt bike, follow these steps: Locate the brake lever and find the adjusting bolt.
Loosen the bolt to increase or decrease brake lever travel until it feels comfortable. When it comes to riding a dirt bike, having properly adjusted brakes is crucial for safety and optimal performance. Adjusting the front brake ensures that you can effectively control your bike’s speed and stop when needed.
Fortunately, adjusting the front brake on a dirt bike is a relatively simple process that can be done at home with just a few tools. We will guide you through the steps to adjust your front brake, ensuring a smooth and responsive braking experience on your dirt bike. So, let’s get started!

Credit: www.dirtrider.com
Importance Of Proper Brake Adjustment
The importance of proper brake adjustment cannot be overstated when it comes to ensuring safety and control on your dirt bike. By maintaining and adjusting your front brake, you can prevent accidents and potential injuries.
Having your front brake properly adjusted allows for efficient braking power, enabling you to stop quickly when needed. This is crucial, especially when riding at high speeds or encountering unexpected obstacles on off-road trails.
Furthermore, proper brake adjustment ensures optimal control over your dirt bike. When the front brake is too loose or too tight, it affects your ability to maneuver the bike smoothly. This can lead to loss of control and potentially dangerous situations.
Regularly inspecting and adjusting your front brake is a proactive measure that every dirt bike rider should take. Pay attention to the brake lever free play, rotor alignment, and brake pad wear. If any issues are identified, take the necessary steps to adjust or replace the components.
Remember, your safety and the safety of others depend on having a properly adjusted front brake. So take the time to check and adjust your brake regularly, and enjoy a safer and more controlled riding experience on your dirt bike.
Tools Needed for Brake Adjustment
To adjust the front brake on your dirt bike, you will need the following tools:
| Tool | Description |
|---|---|
| Brake wrench | A specialized tool to adjust brake components. |
| Allen wrench set | Various sizes for tightening or loosening Allen bolts. |
| Screwdriver | Flathead or Phillips head, depending on your bike’s brake system. |
| Brake fluid | Essential for maintaining proper brake function and performance. |
With these tools at hand, you’ll be able to make the necessary adjustments to your dirt bike’s front brake to ensure
optimal performance and safety during your rides.
Step-by-Step Guide to Adjusting Front Brake
Start by locating the brake cable adjuster near the brake lever. Loosen the lock nut using a wrench. Then, turn the adjuster counterclockwise to create slack in the brake cable. Check the lever for any play or excessive movement. If necessary, adjust the cable further until the desired amount of slack is achieved.
Position the brake lever to a comfortable and suitable height for your hand reach. Ensure that the lever is parallel to the handlebars and easy to grip. Tighten the lever clamp using an Allen wrench, taking care not to overtighten. Test the lever’s movement by pulling it toward the handlebar and releasing it. It should spring back smoothly and freely.
With the lever in its resting position, turn the brake cable adjuster clockwise to reduce the slack in the cable. Make small adjustments until you achieve the desired brake lever feel. Check for any brake drag or excessive tightness. The lever should have a firm, responsive feel without excessive resistance.
Once the adjustment is complete, take your dirt bike for a test ride in a safe, open area. Gradually increase speed and apply the front brake, while paying attention to its responsiveness and stopping power. If necessary, revisit the previous steps to fine-tune the adjustment until the brake performs optimally.
Troubleshooting Common Brake Problems
In order to maintain the best performance and ensure safe riding, it is essential to regularly adjust the front brake on your dirt bike. One common brake problem that riders often encounter is a spongy brake lever. This can make it difficult to achieve optimal braking control. To remedy this issue, you can start by checking the brake fluid level in the master cylinder and topping it up if necessary. Next, you should bleed the brake system to remove any air bubbles that may be causing the sponginess. Additionally, you may need to inspect the brake pads for wear and replace them if needed.
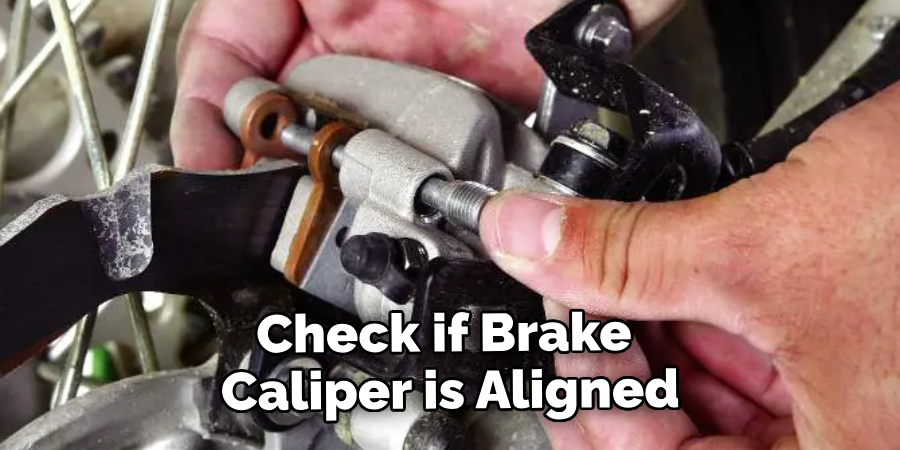
Another common problem is a brake that drags or does not release properly. This can lead to excessive heat and premature wear of the brake components. To address this issue, you should first check if the brake caliper is properly aligned and centered on the rotor. If not, make the necessary adjustments to ensure proper alignment. It is also important to inspect the brake caliper piston and ensure it moves smoothly. Lubricating the piston with brake fluid can help improve its movement. Finally, check the brake lever free play and adjust it if necessary to ensure smooth operation.
Uneven braking power is another issue that riders may face. This can result in imbalanced stopping power, affecting control and safety. To troubleshoot this problem, start by inspecting the brake pads for wear and replace them if needed. Next, check the brake rotor for any warping or damage. If necessary, you should replace the rotor to ensure even braking. Lastly, ensure that the brake caliper is properly aligned and centered on the rotor to achieve balanced braking power on both sides.
Importance Of Regular Brake Maintenance
Regular brake maintenance is crucial for ensuring the optimal performance and safety of your dirt bike. By taking the time to adjust the front brake on your dirt bike, you can extend the lifespan of its brake components and avoid costly repairs in the long run.
When it comes to extending the lifespan of brake components, proper adjustment is key. Over time, the brake pads can wear down, causing reduced braking power and potential damage to other parts of the braking system. By regularly adjusting the front brake, you can ensure that the brake pads are in the correct position and make necessary adjustments to prevent excessive wear and tear.
Moreover, regular brake maintenance allows you to identify any issues with the braking system before they escalate, saving you both time and money. By inspecting the brake components and making necessary adjustments, you can spot any signs of wear, damage, or misalignment early on, preventing costly repairs and ensuring your dirt bike’s optimal performance.
| Benefits of Regular Brake Maintenance: |
|---|
| 1. Extends the lifespan of brake components |
| 2. Ensures optimal braking power |
| 3. Identifies issues before they escalate |
| 4. Prevents costly repairs |
Tips For Optimal Front Brake Performance
In order to ensure optimal front brake performance on your dirt bike, there are a few important tips you should keep in mind. Firstly, it is crucial to regularly check your brake pads to determine if they have worn down and need to be replaced. This will help maintain proper braking power and prevent any potential accidents. Secondly, lubricating the brake pivots is essential to ensure smooth and efficient braking.
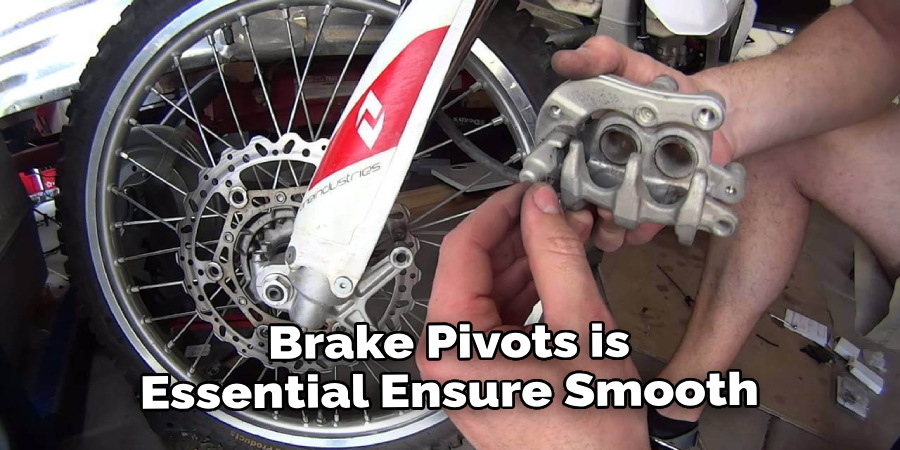
Applying a suitable lubricant will minimize friction and allow the brake components to work effectively. Lastly, make sure to maintain proper brake fluid levels by checking the fluid reservoir regularly. If the fluid level is low, it can lead to a decrease in braking power. By following these tips, you can effectively adjust the front brake on your dirt bike and enhance its overall performance.
Frequently Asked Questions For How To Adjust Front Brake On Dirt Bike
How Do You Adjust The Front Brake On A Dirt Bike?
To adjust the front brake on a dirt bike, start by loosening the brake lever’s adjustment bolt. Then, pull the brake lever towards the handlebar to engage the brake pads. Tighten the adjustment bolt until the brake lever has around 1/4 inch of free play.
Finally, test the brake to ensure proper operation.
What Tools Do I Need To Adjust The Front Brake On My Dirt Bike?
To adjust the front brake on your dirt bike, you will need a wrench or socket set to loosen the brake lever’s adjustment bolt, and possibly a screwdriver or several Allen wrenches to adjust the brake lever position or brake pad alignment.
How Often Should I Adjust The Front Brake On My Dirt Bike?
It is recommended to adjust your front brake on a dirt bike every few rides or whenever you notice the brake lever feels spongy or the brake pads are not engaging properly. Regular maintenance and adjustment of the front brake will help ensure optimal performance and safety during your rides.
Conclusion
Adjusting the front brake on your dirt bike is a vital maintenance task that should not be overlooked. With the right tools and knowledge, you can ensure optimal brake performance and enhance your riding experience. Remember to regularly inspect and adjust your front brake to maintain safety and control on the trails.
By following the steps outlined in this guide, you’ll be able to tackle any front brake adjustment with confidence. Safe riding!