To wire lights on a dirt bike without a battery, connect the headlight wires directly to the stator output wires. Wiring lights on a dirt bike without a battery can be a practical solution when you want to add illumination without the need for an extra power source.
Whether you enjoy night riding or simply need enhanced visibility, this process allows you to connect lights directly to the stator output wires. While it may seem intimidating, wiring lights without a battery can be straightforward when you understand the steps involved.
By following a few simple instructions, you can have your dirt bike equipped with lights and ready to go in no time. In this guide, we will explain how to wire lights on a dirt bike without the need for a battery, so you can ride safely and confidently in low-light conditions.
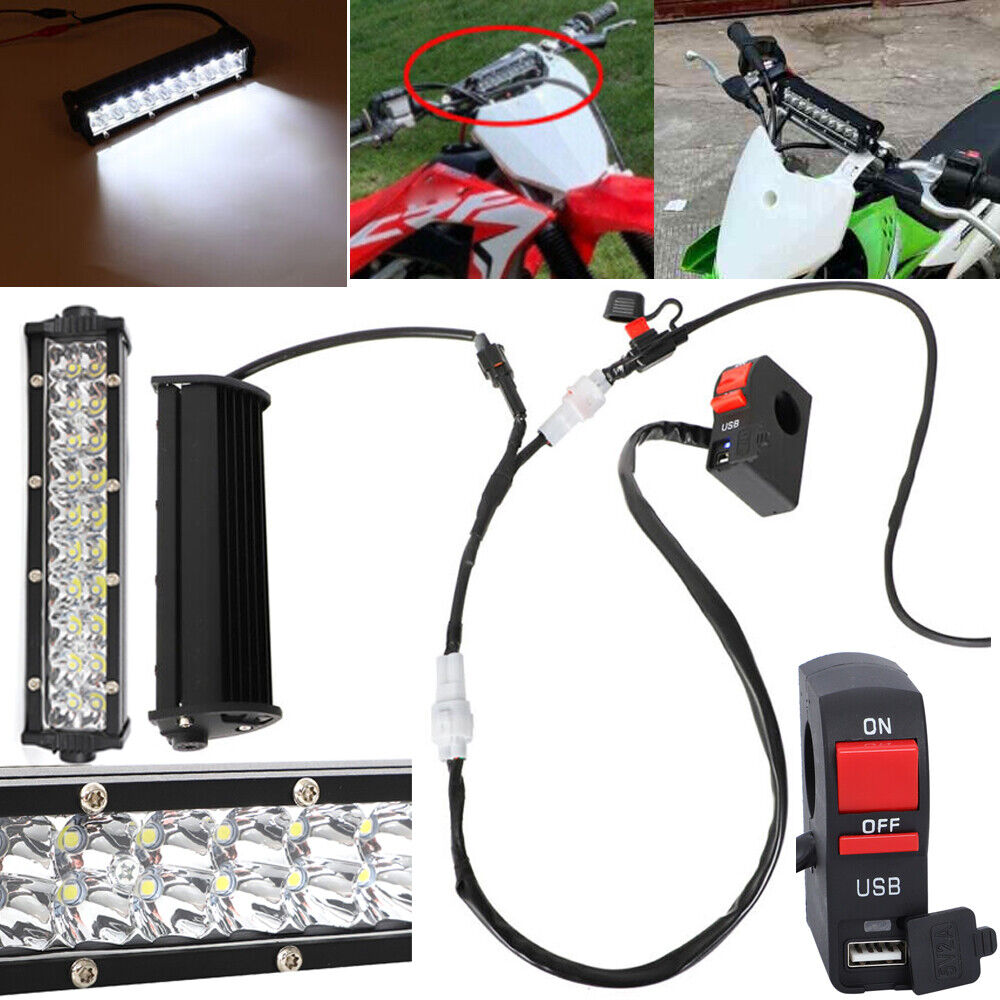
Credit: www.ebay.com
Importance Of Lights On Dirt Bike
Having proper lights on your dirt bike is crucial as it enhances safety and visibility during your off-road adventures. Whether you’re riding in low-light conditions or at night, **lights** play a vital role in preventing accidents. Additionally, **complying with legal requirements** is essential to avoid any legal issues.
By **maximizing off-road riding experience**, lights allow you to explore new terrains with confidence. They help you navigate through challenging trails and improve your overall riding experience. With the right lighting setup, you can easily spot obstacles, identify other riders, and stay aware of your surroundings.
So, when it comes to wiring lights on your dirt bike without a battery, it’s important to understand the significance they hold. Take the necessary steps to install lights that suit your riding needs, ensuring that you remain safe and comply with all legal obligations.
How to Wire Lights on Dirt Bike Without Battery: Step by Step Guide
Assessing Wiring Options
In this blog post, we will explore how to wire lights on a dirt bike without a battery, starting with assessing wiring options. Determining available power sources is crucial in this process, as it will dictate the type of wiring system you can implement. You have a few options to consider:
1. **Running lights off the engine**: One option is to wire the lights directly to the bike’s engine. This can be done by tapping into the stator or magneto, which generate electricity to power the bike. However, it’s important to ensure that the lights don’t draw too much power and overload the engine’s electrical system.
2. **Using a voltage regulator**: Another option is to install a voltage regulator in conjunction with the engine’s electrical system. This helps stabilize the voltage output and protects the lights from voltage spikes or fluctuations.
3. **Utilizing capacitors**: Capacitors can be used as a temporary power source to provide an additional power boost when needed. They store electrical energy and release it when the demand exceeds the supply, ensuring that your lights stay bright and functional.
By evaluating the benefits of batteryless wiring, such as reduced weight, simplicity, and cost savings, you can make an informed decision on the best wiring approach for your dirt bike lights.
Understanding Electrical Components
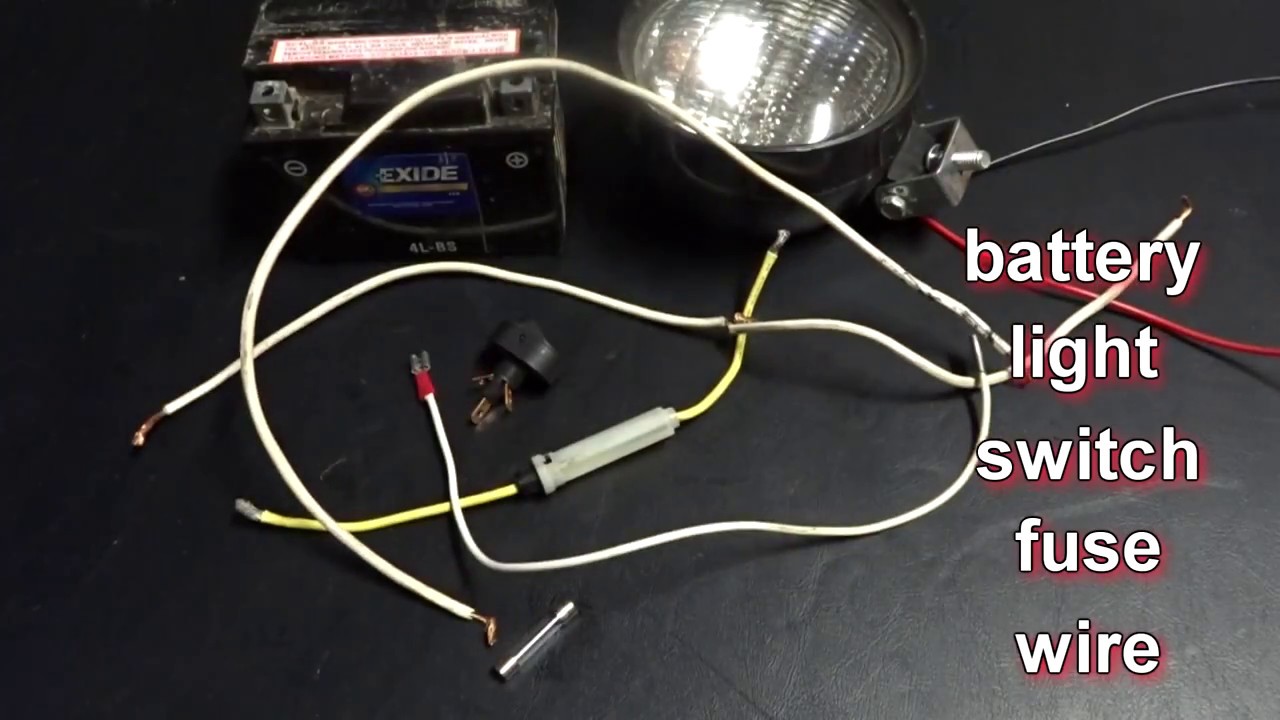
When it comes to wiring lights on a dirt bike without a battery, it is important to have a clear understanding of the essential electrical components involved. These components include the headlight, taillights, indicators, switches, and wiring harness.
Headlight, Taillight, and Indicators:
The headlight is a crucial component that illuminates the path ahead, ensuring visibility during nighttime or low-light riding conditions. Taillights, on the other hand, serve as a safety feature, making the dirt bike visible to other riders or vehicles from the rear. Indicators, or turn signals, are necessary for indicating the intended direction, enhancing road safety for the rider.
Switches and Wiring Harness:
Switches act as the control mechanism for activating or deactivating specific lights of the dirt bike. They allow the rider to control different lighting aspects, providing convenience and safety. The wiring harness, composed of wires, connectors, and fuses, connects all the electrical components together and ensures the smooth flow of electricity.
Selecting Appropriate Lights
When it comes to wiring lights on a dirt bike without a battery, selecting the appropriate lights is essential. Two common options are LED and halogen lights. LED lights are known for their energy efficiency, long lifespan, and bright illumination. On the other hand, halogen lights are more affordable and provide a warmer light. When choosing between the two, consider factors like your budget, riding conditions, and personal preference.
Another important consideration is selecting the right wattage and lumens for off-road use. Higher wattage bulbs may provide brighter light but consume more power. It’s crucial to strike a balance between sufficient illumination and preserving the bike’s electrical system. For off-road riding, a wattage range of 35-55 watts is generally recommended. Additionally, look for lights with a lumen output between 1000-3000 lumens to ensure good visibility without draining too much power.
Wiring Lights Directly To Stator
Wiring lights on a dirt bike without a battery involves directly connecting the lights to the stator. The stator is an essential part of the bike’s electrical system that generates electricity to power various components. To wire the lights, you first need to identify the stator and understand its function. The stator is usually located in the engine’s left-hand side cover and consists of a coil and magnets. Its main role is to convert the engine’s rotational energy into electrical energy.
Once you have located the stator, you can connect the lights to the stator’s electrical leads. These leads carry the generated electricity and can be connected to the lights using appropriate wiring and connectors. It is important to follow the manufacturer’s guidelines or consult a professional when wiring the lights to ensure proper installation and functionality.
Using A Voltage Regulator
When wiring lights on a dirt bike without a battery, using a voltage regulator is essential. It helps regulate the voltage output from the bike’s stator, ensuring a stable and consistent power supply to the lights. This is especially important when riding in off-road conditions where the bike’s electrical system can experience fluctuations.
The benefits of using a voltage regulator include:
- Protection against excessive voltage that can damage the lights or other electrical components.
- Prevention of voltage drops that may cause the lights to dim or flicker.
- Enhanced efficiency and durability of the lights, as they receive a consistent power supply.
- Improved safety for the rider, as reliable lighting ensures better visibility during night rides or in low-light conditions.
- Compatibility with various types of lights, allowing for customization and personalization of the bike’s lighting setup.
- Easy installation and connection of the voltage regulator to the bike’s electrical system.
To wire lights on a dirt bike without a battery, follow the manufacturer’s instructions for the specific voltage regulator you have. Connect the regulator to the stator output wires and the light’s positive and negative wires. Ensure proper insulation and secure connections to prevent any electrical issues or short circuits.
Wiring Lights With Capacitor
When wiring lights on a dirt bike without a battery, a capacitor can play a crucial role in providing a stable power source. A capacitor stores electrical energy and releases it when needed, ensuring a continuous and reliable power supply for the lights.
Exploring the role of a capacitor:
In this process, capacitor selection and installation are key factors to consider. Choosing the right capacitor with the appropriate capacitance and voltage rating is essential to meet the voltage requirements of the lights. Additionally, installing the capacitor in close proximity to the lights can minimize voltage drops and ensure optimal performance.
| Capacitor Selection and Installation |
|---|
|
Installing A Rectifier
When wiring lights on a dirt bike without a battery, it is important to install a rectifier. The rectification process involves converting alternating current (AC) into direct current (DC), allowing the lights to function properly. To do this, connect the lights with the rectifier using the following steps:
- Make sure you have chosen a suitable rectifier for your dirt bike model.
- Identify the positive and negative terminals on the rectifier.
- Connect the positive terminal of the rectifier to the positive wire of the lights.
- Connect the negative terminal of the rectifier to the negative wire of the lights.
- Ensure all connections are secure and insulated to prevent electrical interference.
- Test the lights to ensure proper functionality.
Following these steps will enable you to wire lights on your dirt bike without a battery while ensuring safe and efficient operation for your nighttime rides.
Ensuring Proper Grounding
Ensuring proper grounding is crucial in electrical systems, particularly when wiring lights on a dirt bike without a battery. Grounding provides a path for electrical current to flow safely, preventing the risk of shock or damage to the lights and other components.
To connect lights to a reliable ground source, follow these steps:
- Identify a suitable grounding point on the frame or engine block of the dirt bike. This should be a clean, bare metal surface.
- Remove any paint or debris from the chosen grounding point using sandpaper or a wire brush.
- Connect the ground wire of the lights to the grounding point using a secure and corrosion-resistant connector.
- Ensure a proper and tight connection to maintain a reliable electrical connection.
- Test the lights to verify functionality and check for any loose connections.
- Regularly inspect and maintain the grounding connection to prevent corrosion or loosening over time.
By following these guidelines, you can wire lights on a dirt bike without a battery while ensuring proper grounding, promoting safety, and preserving the longevity of the electrical system.
Securing Wiring Connections
The wiring connections on a dirt bike without a battery need to be secured properly to ensure safe and reliable functionality. Soldering techniques can be employed to create strong and durable connections. Soldering involves melting a metal alloy onto the wires, providing a solid bond. It is important to utilize heat shrink tubing to insulate the soldered connections.
Heat shrink tubing is placed over the soldered joint and then heated, causing it to contract and create a tight seal. This protects the wiring from moisture, dirt, and other potential damage. By using soldering techniques and heat shrink tubing, you can ensure that the wiring connections on your dirt bike are secure and well-insulated, allowing for optimal performance.
Conducting Safety Checks
Verifying light functionality
When wiring lights on a dirt bike without a battery, it’s crucial to perform safety checks to ensure proper functionality. Start by testing the wiring for correct connections. Inspect each wire and connector, ensuring they are securely connected and free from any damage or corrosion. Use a multimeter to verify proper voltage levels throughout the circuit.
Next, test the functionality of the lights. Turn on the bike and switch on the lights one by one, checking if they illuminate as intended. Ensure that the headlight, taillight, and brake light work properly. Additionally, test the turn signals to ensure they are operational.
By carefully conducting these safety checks, you can ensure that the lights on your dirt bike without a battery are wired correctly and functioning safely. Remember to periodically inspect the wiring and lights to identify any issues and address them promptly.
Troubleshooting Common Issues
When wiring lights on a dirt bike without a battery, there are some common issues that may arise. It’s important to understand these potential problems in order to identify and rectify any wiring failures.
- Loose Connections: Loose connections can cause lights to flicker or not work at all. Make sure all wires are securely connected.
- Broken Wires: Over time, wires can become frayed or damaged, leading to malfunctions. Check for any signs of wear and repair or replace as needed.
- Faulty Switches: Switches can wear out or become faulty, preventing lights from turning on or off. Test the switch and replace it if necessary.
- Incorrect Wiring: Wiring lights incorrectly can lead to erratic behavior. Make sure to follow the correct wiring diagram for your specific dirt bike model.
- Blown Fuses: If your lights suddenly stop working, it could be due to a blown fuse. Check the fuse and replace it if necessary.
- Inadequate Power Supply: Without a battery, the power supply may be limited. Consider using a voltage regulator to ensure a stable power source.
By understanding these potential issues and addressing them accordingly, you can successfully wire lights on your dirt bike without a battery. Stay vigilant in troubleshooting and maintaining your wiring system for optimal performance.
Best Practices For Maintaining Lights
Regular cleaning and inspection of lights is essential for maintaining the optimal performance of your dirt bike’s lighting system. **Clean the lights** regularly to remove any dirt, grime, or debris that may have accumulated on the surface. **Inspect the lights** for any signs of damage, cracks, or loose connections.
If you notice any issues, it is important to **replace the bulbs or other components** as needed to ensure proper functioning. Keeping the lights in good condition not only enhances safety but also extends their lifespan. By adopting these best practices, you can ensure that your dirt bike lights remain in top-notch condition without the need for a battery.
Frequently Asked Questions For How To Wire Lights On Dirt Bike Without Battery
Can I Wire A Light Bar Directly?
Yes, it is possible to wire a light bar directly.
Can A Dirt Bike Run Without A Battery?
Yes, a dirt bike can run without a battery.
Can You Wire Lights Without A Relay?
Yes, lights can be wired without a relay. However, using a relay is recommended for safety and efficiency.
Can I Put A Headlight On My Dirt Bike?
Yes, you can add a headlight to your dirt bike. It is a common modification that can enhance visibility at night.
Conclusion
To sum up, wiring lights on a dirt bike without a battery is a great way to enhance your off-road riding experience. By following the steps outlined in this guide, you can safely and effectively install lights on your dirt bike, even if it doesn’t have a battery.
Remember to gather all the necessary materials and tools, carefully plan your wiring layout, and ensure proper connections and insulation to avoid any potential hazards. Additionally, regularly inspect and maintain your lights to ensure they continue to work efficiently. With the right knowledge and techniques, you can have a well-lit dirt bike that enables you to ride confidently at night or in low-light conditions.
So, go ahead and enjoy the thrill of off-road riding without any limitations!