To restore dirt bike plastics, start by cleaning the plastics with soap and water, followed by sanding any roughness or discoloration using fine-grit sandpaper. Apply a plastic cleaner or polish to remove any remaining imperfections, and finish by applying a UV protectant to prevent future damage.
Credit: www.reddit.com
How to Restore Dirt Bike Plastics: Step by Step Guide
Assessing The Damage
Inspecting your dirt bike plastics is the first step to restoring them. Carefully examine the entire surface, looking for cracks, scratches, and fading. Identify any areas where the plastic is damaged or showing signs of wear and tear. Take note of the extent of the damage, as this will determine the appropriate restoration techniques. Evaluate whether the damage is minor, such as superficial scratches, or more severe, like deep cracks. Having a clear understanding of the damage will help you plan the necessary repairs.
Preparing For Restoration
To restore dirt bike plastics, it is important to start by preparing for the restoration process. This involves gathering the necessary materials and tools. First, **cleaning** the dirt bike plastics is crucial to remove any dirt, grime, or grease that may have accumulated. This can be done using a mild detergent and water solution, along with a soft sponge or cloth.
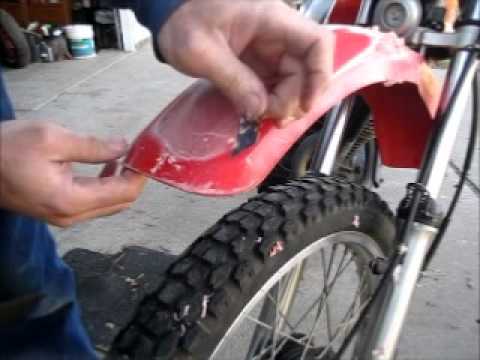
Second, **removing** stickers, decals, and other remnants from the plastics is essential to create a clean surface for restoration. This can be done using a heat gun or hairdryer to soften the adhesive, followed by gently peeling them off. It is important to be cautious to avoid damaging the plastics. By following these steps, you can effectively prepare the dirt bike plastics for restoration.
Restoring Cracks And Scratches
Restoring dirt bike plastics is an essential part of bike maintenance that can extend the life of your bike. When the plastics are cracked or scratched, they not only look unsightly but also compromise the bike’s overall performance. To restore the plastics, start by filling in the cracks with plastic weld or epoxy, ensuring a strong bond. Once the cracks are filled, sand the surface to smooth out any imperfections. This will create a smooth canvas for the next step.
The final step is applying primer to the damaged areas. Primer helps the paint adhere better and provides a protective layer. Remember to always use high-quality materials for longer-lasting results. By following these steps, you can restore dirt bike plastics to their former glory and keep your bike looking and performing its best.
Rejuvenating Faded Plastics
Restoring dirt bike plastics can be done using various methods. One effective technique is to rejuvenate faded plastics by using heat and chemical methods. By applying heat with a heat gun or hot water, the plastic can be softened, allowing you to reshape or remove any dents or scratches. Additionally, using chemicals like denatured alcohol or acetone can help remove stubborn stains and discoloration.
To restore color and achieve a glossy finish, you can apply a plastic restorer or dye specifically designed for dirt bike plastics. These products are available in various colors and can bring back the vibrant look of the plastics. Be sure to follow the manufacturer’s instructions carefully when applying the restorer or dye.
Buffing and polishing the plastics can further enhance the restoration process. Using a polishing compound and a buffing wheel, you can remove minor scratches and bring back the shine. It is important to use circular motions and apply even pressure to ensure an even finish.
Protecting And Preventing Future Damage
Protecting and preventing future damage to your dirt bike plastics is essential for maintaining its appearance and durability. One effective method is to apply a protective sealant or coating. This creates a barrier that shields the plastics from scratches, UV rays, and other elements that can cause fading or damage. Additionally, using guards and covers for added protection is highly recommended.
These can protect vulnerable areas such as the fenders and side panels from impacts and debris. Regular cleaning and maintenance are also crucial for prolonging the life of your dirt bike plastics. Ensure you remove any dirt or grime using a mild soap and water solution, and avoid using abrasive cleaners that can scratch the surface. Finally, inspect your plastics regularly for any signs of damage or wear and address them promptly to prevent further issues.
Reassembling And Finishing Touches
Reassembling and adding finishing touches are the final steps in restoring dirt bike plastics. To ensure a proper fit and alignment, carefully reinstall the restored plastics on the dirt bike. Start by checking if each piece aligns correctly with the bike’s frame and other components. Make any necessary adjustments to ensure a snug fit.
Once the pieces are in place, it’s time to add the finishing touches for a professional look. Clean the plastics thoroughly, removing any dirt, grease, or residue. Apply a protective sealant to prevent future damage and maintain the plastics’ appearance. For a polished finish, consider using a plastic polish or restoration product.
Additionally, take note of any decals or graphics that were removed during the restoration process. If they are still in good condition, carefully reapply them to the plastics using a heat gun or hairdryer for proper adhesion. Lastly, step back and appreciate your hard work as your dirt bike is now ready to hit the trails with its newly restored plastics.
Frequently Asked Questions For How To Restore Dirt Bike Plastics
How Do You Restore Dirt Bike Plastics?
To restore dirt bike plastics, start by cleaning the plastics with soap and water. Then, use a plastic-specific cleaner and a scrub brush to remove scuffs and scratches. For deep scratches, you can use sandpaper followed by a heat gun to reshape the plastic.
Finally, apply a plastic protectant or wax to keep the plastics looking fresh and new.
Can You Paint Dirt Bike Plastics?
Yes, you can paint dirt bike plastics. Start by cleaning the plastics thoroughly and sanding them to create a smooth surface. Next, apply a primer to help the paint adhere better. Then, spray on your desired color of paint in light, even coats, allowing each coat to dry before applying the next.
Finish by applying a clear coat for added protection.
How Often Should You Clean Dirt Bike Plastics?
Dirt bike plastics should be cleaned after every ride. This prevents dirt, mud, and other debris from causing damage to the plastics. Regular cleaning also helps maintain the appearance of the plastics and extends their lifespan. A quick wash with soap and water and a wipe-down with a plastic cleaner should be sufficient to keep the plastics clean and in good condition.
Conclusion
To sum up, restoring dirt bike plastics is a simple and effective process that can greatly enhance the appearance and lifespan of your bike. By following the steps outlined in this guide, you can easily remove scratches and restore faded or damaged plastics.
Regular maintenance and a little elbow grease will keep your bike looking its best for years to come. Remember, with just a few inexpensive tools and some patience, you can achieve professional-looking results on your own. So, don’t hesitate to give it a try and give your bike the makeover it deserves.
Happy restoring!