To put grips on a dirt bike, start by removing the old grips using compressed air or a grip removal tool. Then, apply grip glue to the handlebars and slide the new grips onto them, making sure they are aligned properly.
Credit: dirtbikemagazine.com
How to Put Grips on a Dirt Bike: Step by Step Guide
Choosing The Right Grip
Choosing the right grip for your dirt bike is crucial for a comfortable and controlled ride. There are several factors to consider when selecting dirt bike grips. Firstly, the type of grip you choose will depend on your personal preference and riding style. The market offers a variety of grips, including half-waffle, full-waffle, and pillow top grips. Each type offers different levels of traction and vibration dampening.
In addition to the grip type, it’s important to look for key features in high-quality dirt bike grips. These features include durability, grip pattern, and material. Grips made from high-quality materials like rubber or silicone provide excellent grip and durability for long-lasting performance.
When putting grips on your dirt bike, make sure to follow the manufacturer’s instructions. A secure and tight grip installation is essential for safety and control while riding. Remember to regularly inspect and replace your grips when they become worn or damaged to maintain optimal performance.
Removing The Old Grips
When it comes to removing the old grips on a dirt bike, there are a few tools required for the job. To ensure a successful grip removal process, you will need a screwdriver or an air compressor with a blowgun attachment, a utility knife, and a can of compressed air.

To begin, follow these step-by-step guidelines for removing the old grips:
- Start by using the utility knife to make a small cut along the length of the grip.
- Once you have created a small opening, insert the screwdriver or blowgun attachment under the grip and gently twist it to loosen the grip.
- If the grip is stubborn or worn-out, use the compressed air can to blow air between the grip and the handlebar, making it easier to remove.
- Continue twisting and pulling the grip until it is completely separated from the handlebar.
- Repeat the process for the other grip on the bike.
- After removing both grips, clean the handlebars thoroughly to prepare for installing the new grips.
By following these tips and using the right tools, you can easily remove old grips from your dirt bike and get ready to put on fresh, new grips for a better riding experience.
Installing The New Grips
Installing new grips on a dirt bike is a relatively simple process that can greatly improve your riding experience. Before starting the installation, ensure that you have the necessary tools handy, including a vice grip, screwdriver, grip glue, and rubbing alcohol.
Begin by preparing the handlebars and grips for installation. Carefully remove the old grips using the vice grip and screwdriver, being mindful not to damage the throttle tube or handlebars. Once the old grips are removed, clean the handlebars with rubbing alcohol to remove any dirt or residue.
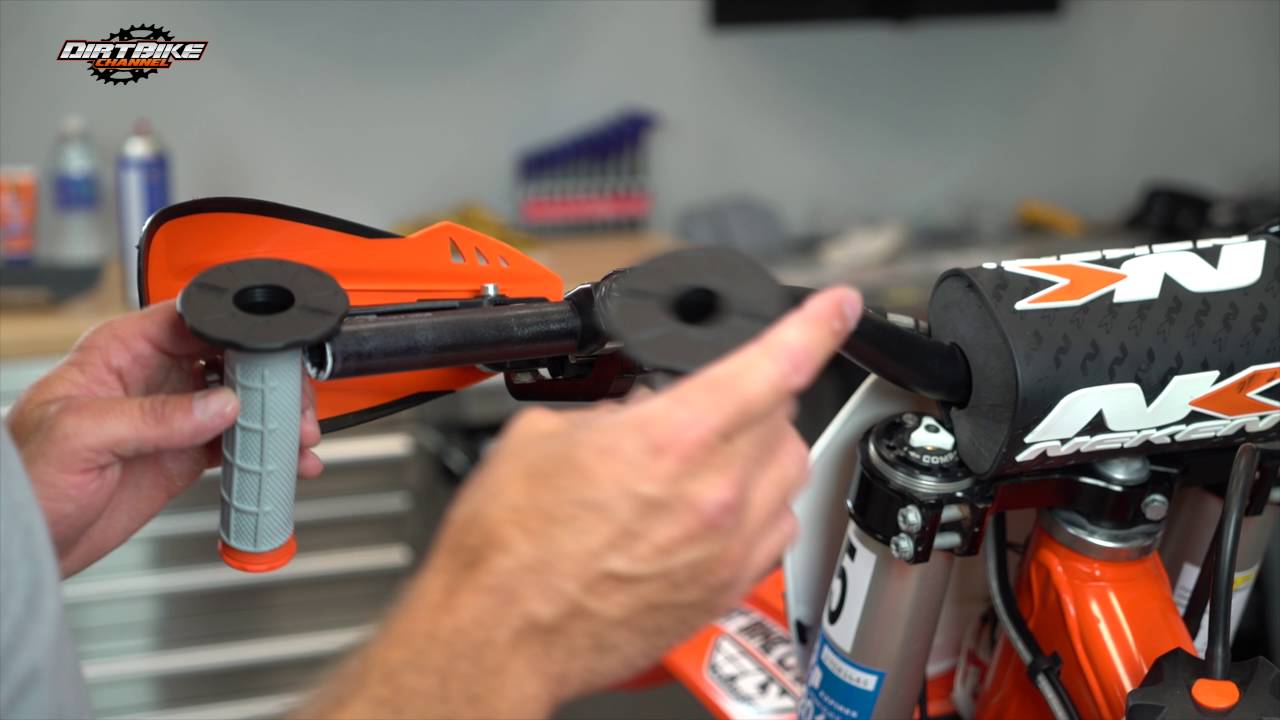
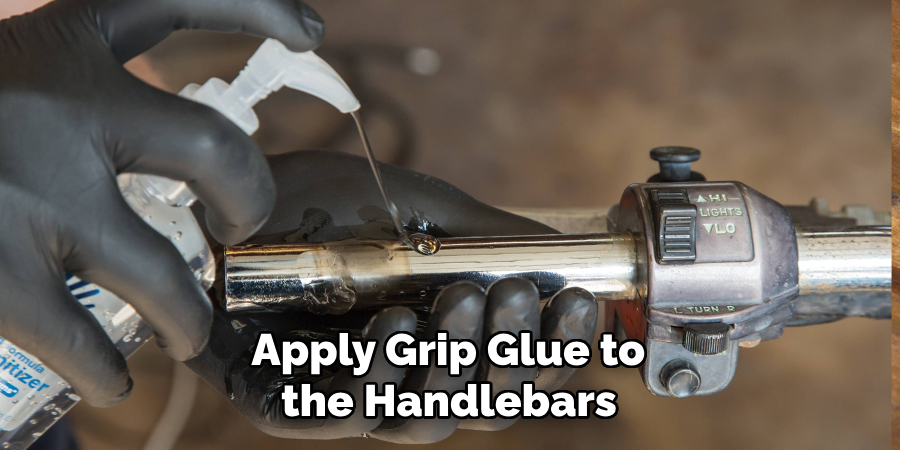
Next, apply grip glue to the handlebars. Spread a thin layer of glue along the entire length of the handlebars, ensuring that it is evenly distributed. Then, align the new grips with the handlebars and slide them on, applying firm pressure to secure them in place.
Finally, allow the grip glue to dry for the recommended amount of time before using your dirt bike. This will ensure that the grips are properly bonded to the handlebars and will not slip during use.
By following this step-by-step guide, you can easily install new grips on your dirt bike and enjoy a more comfortable and secure riding experience.
Bonus Tips For Effective Grip Installation
Putting grips on a dirt bike is a crucial step in ensuring a secure and comfortable ride. When it comes to grip installation, using grip glue is highly recommended for a secure attachment. This adhesive provides a strong bond between the grip and handlebar, preventing slippage even in the most challenging terrains.
Proper hand position and grip alignment are essential to optimize your control over the bike. Aim for a neutral wrist position and ensure that the grip aligns with your palm and fingers comfortably. This will reduce fatigue and enhance your overall riding experience.
It’s also important to maintain and care for your dirt bike grips to prolong their lifespan. Regularly clean them using mild soap and water, and thoroughly dry them to prevent mold and deterioration. Additionally, avoid over-tightening the screws as this can damage the grips.
By following these tips and taking proper care of your dirt bike grips, you can enjoy a safe and comfortable ride while tackling various terrains.
Troubleshooting Common Issues
Fixing loose or slipping grips on a dirt bike can greatly improve your riding experience. One common issue that riders face is gri
Upgrading To Pro-Level Grips
Upgrading to pro-level grips for your dirt bike can provide a wide range of benefits. Firstly, advanced dirt bike grips offer improved handling and control, allowing you to navigate through challenging terrains with more ease. These high-performance grips are designed to enhance your riding experience, ensuring maximum comfort and reducing hand fatigue.
Choosing the right advanced dirt bike grips can make all the difference. Here are some expert tips to help you make the best choice:
- Consider the material: Opt for grips made of durable and high-quality materials such as rubber or silicone.
- Check for grip patterns: Look for grips with patterns that provide excellent traction and grip.
- Evaluate grip thickness: Find the right thickness that suits your preference and riding style.
- Assess vibration dampening: Look for grips with features that reduce vibration, offering a more comfortable ride.
- Consider weather resistance: Ensure the grips can withstand different weather conditions without deteriorating.
When it comes to installing pro-level grips, it’s always helpful to follow a step-by-step guide or seek professional assistance. Taking the time to properly install the grips will optimize their performance and longevity. Upgrade your dirt bike grips and experience the difference in your riding!
Frequently Asked Questions On How To Put Grips On A Dirt Bike
How Do You Put Grips On A Dirt Bike?
To put grips on a dirt bike, start by removing the old grips using compressed air or rubbing alcohol. Then, apply grip glue or hairspray to the handlebar. Slide the new grips onto the handlebar, making sure they are secure.
Finally, let them dry for a few hours before riding your dirt bike.
What Tools Are Needed To Put Grips On A Dirt Bike?
To put grips on a dirt bike, you will need a few tools, including compressed air or rubbing alcohol to remove the old grips. Grip glue or hairspray to secure the new grips, and a utility knife to trim the excess grip.
Additionally, having a rag or paper towel for cleaning is helpful.
How Long Does It Take To Put Grips On A Dirt Bike?
Putting grips on a dirt bike typically takes anywhere from 20 to 30 minutes. However, it may take longer if you encounter any difficulties such as old grips that are difficult to remove or if the glue takes longer to dry.
It’s important to take your time and ensure the grips are properly installed.
Conclusion
Putting grips on a dirt bike is a simple task that can greatly enhance your riding experience. By following the step-by-step instructions outlined in this blog post, you can ensure a secure and comfortable grip on your handlebars. Remember to choose the right grips for your bike and maintain proper technique while installing them.
Now that you have the necessary knowledge, go ahead and give your dirt bike a personal touch with new grips!