To paint a dirt bike engine, you need to first prepare the engine by cleaning and removing any oil or grease. Then, apply a suitable engine paint using a paintbrush or spray can, making sure to cover the entire engine surface evenly.
Painting a dirt bike engine requires some preparation and careful application. By following the right steps, you can give your engine a fresh, new look. In this guide, we will go through the process of painting a dirt bike engine, from preparing the engine surface to applying the paint.
Whether you want to protect the engine from rust or simply want to customize your bike, painting the engine can be a rewarding project. With some basic tools and a bit of patience, you can achieve a professional-looking finish that will make your dirt bike stand out.

Credit: www.vitalmx.com
How to Paint a Dirt Bike Engine: Step by Step Guide
Cleaning The Engine: Remove Dirt And Grease
When it comes to painting a dirt bike engine, you’ll first need to clean the engine thoroughly to remove any dirt and grease. Start by using a degreaser to effectively clean the surface of the engine. Scrubbing with a brush will help to remove any stubborn dirt that may be stuck on the engine. After scrubbing, rinse the engine with water and make sure to dry it thoroughly before moving on to the next step of the painting process.
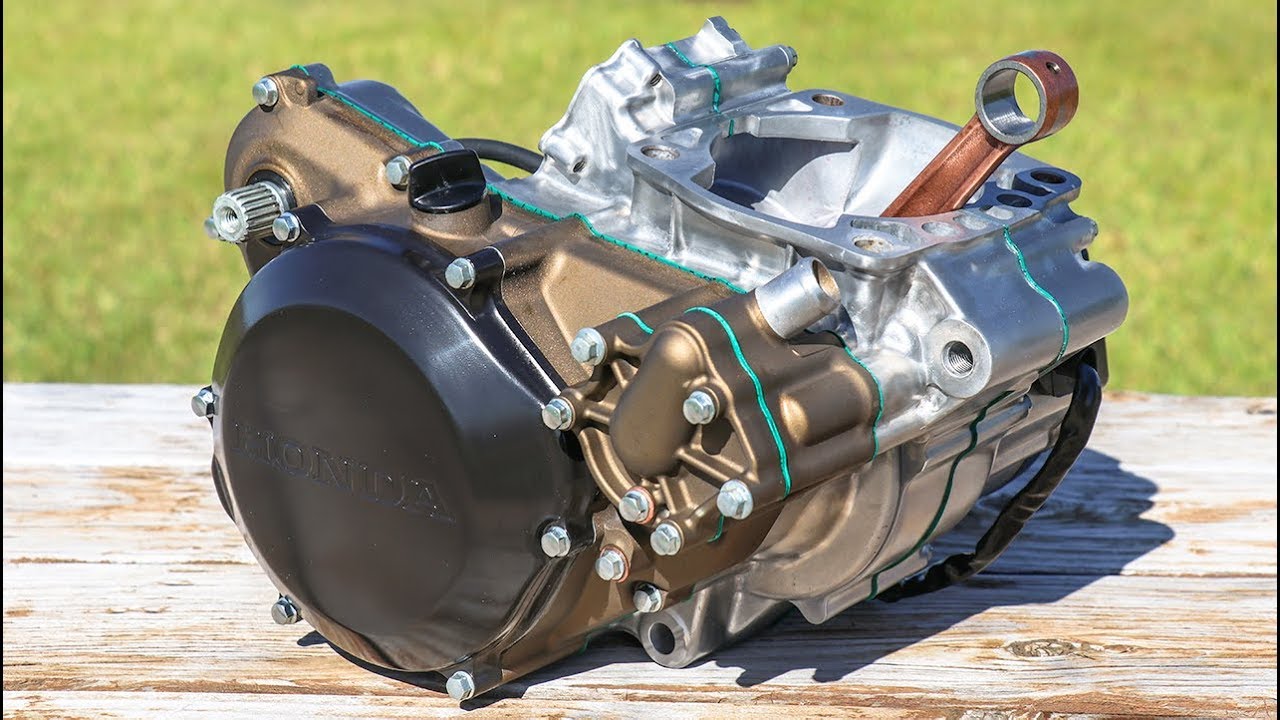
Disassembling The Engine: Remove Parts For Painting
Disassembling the engine is the first step in painting a dirt bike engine. Always refer to the service manual for proper disassembly instructions to avoid any mistakes. Label and organize the parts as you remove them to ensure easy reassembly later. It is crucial to store the removed parts in a safe place to prevent any damage or loss. By following these steps, you can disassemble the engine without any hassle and prepare it for painting.
Choosing The Right Primer: Consider Engine Type And Finish
A crucial step in painting a dirt bike engine is choosing the right primer. It’s essential to consider the engine type and the desired finish when selecting a primer. Make sure to choose a primer that is suitable for your specific engine type. The primer should also be compatible with the paint color and finish you plan to use. This will ensure a smooth and professional-looking result.
When applying the primer, it is important to work in a well-ventilated area to avoid inhaling harmful fumes. This will ensure your safety throughout the painting process. Take the time to prepare the engine surface properly before applying the primer, ensuring it is clean and free of any dirt or grease.
By carefully following these steps and selecting the right primer, you can achieve a durable and aesthetically pleasing paint job for your dirt bike engine.
Preparing The Surface: Sanding And Cleaning
Sanding the engine surface is the first step in preparing to paint a dirt bike engine. This process helps to remove any roughness or imperfections on the surface. Use sandpaper with a fine grit and gently sand the entire engine, paying close attention to any areas that feel rough to the touch. Once the sanding is complete, it’s important to clean the surface thoroughly.
Use a mild solvent or cleaner to remove any dirt, grease, or oil that may be present. This will ensure that the paint adheres properly to the engine. After cleaning, make sure to remove any dust or debris with a clean cloth or compressed air. This will give the engine a smooth finish and allow the paint to apply evenly.
Applying The Primer: Evenly Coat The Engine
Apply the primer using long, sweeping motions
|
Coating your dirt bike engine with primer is a crucial step in the painting process. To apply the primer, use long, sweeping motions, ensuring that the entire engine surface is evenly coated. It’s important to achieve complete coverage to promote adhesion and provide a smooth base for the paint. Once the primer is applied, allow it to dry thoroughly before moving on to the painting step. This will ensure that the paint adheres properly and results in a professional-looking finish. Take your time and be patient during this stage as it will greatly impact the overall quality and longevity of your paint job.
Choosing The Paint: Consider Durability And Heat Resistance
Choosing the right paint for your dirt bike engine is crucial for durability and heat resistance. Opt for a high-quality paint specifically designed for engines, ensuring long-lasting results. Consider the paint’s ability to withstand high temperatures, as engines generate a lot of heat. This will prevent the paint from peeling or chipping off over time.
Additionally, prioritize durability to protect the engine from wear and tear caused by external factors like weather conditions and debris. While functionality is essential, don’t forget to choose a color that reflects your personal style and preference. With the right paint, your dirt bike engine will not only look great but also stay protected and vibrant for years to come.
Preparing The Paint: Mixing And Thinning If Necessary
Finding the right paint for your dirt bike engine is essential to achieve a professional finish. Before starting the painting process, it’s important to prepare the paint properly. Firstly, follow the manufacturer’s instructions carefully for paint preparation. This may include mixing the paint thoroughly to ensure a consistent color.
Additionally, if the manufacturer recommends it, thinning the paint should be done as directed. This will help to maintain the proper viscosity for application. By following these guidelines, you can ensure that your paint is ready for the dirt bike engine and will result in a smooth and durable finish.
Applying The Paint: Coating The Engine Surface
The paint application process is a crucial step in painting a dirt bike engine. Whether you choose to use a spray gun or a brush, it is important to follow certain guidelines for optimal results. First, **apply thin, even coats** of paint to the engine surface. This will ensure better adhesion and a smoother finish. Allow each coat of paint to dry completely before applying the next one. **Patience is key here**, as rushing the process can result in an uneven or clumpy finish. Remember to **take your time and be meticulous** in your application. By following these steps, you can achieve a professional-looking paint job on your dirt bike engine.
Organizing And Cleaning The Parts: Ensure Everything Is In Order
Organizing and cleaning the parts is a crucial step in painting a dirt bike engine. First, sort and arrange the parts according to the disassembly order. This will make it easier to put everything back together later. Next, carefully inspect each part for any damages or wear. If you notice any issues, it’s important to replace the damaged parts before proceeding.
Once the parts are organized and checked, it’s time to clean them thoroughly. Removing any dirt, grease, or grime will ensure a smooth paint application and a lasting finish. Take your time to clean each part using appropriate cleaning agents and tools. By organizing and cleaning the parts, you’ll be ready for the next step of reassembling the engine with confidence.
Reassembling The Engine: Follow The Service Manual Guidelines
Refer to the service manual for proper reassembly steps. This is essential to ensure that you put everything back together correctly. Follow the sequence and torque specifications provided in the manual to ensure that each part is tightened to the correct specifications. Double-check all connections and fasteners to ensure that everything is secure. This will help prevent any issues once the engine is running. Taking the time to carefully follow the guidelines in the service manual will ensure a successful engine reassembly. So, make sure to have the manual on hand and refer to it throughout the process.
Final Touches: Inspecting And Testing The Engine
Inspecting and testing the engine is a crucial step in the process of painting a dirt bike engine. Once you have completed painting the engine, it is important to carefully inspect it for any imperfections or missed spots. Look for areas where the paint may have dripped or where the original color is still visible. Touch up these areas with additional paint to ensure a smooth and consistent finish.
After the touch-up is complete, it is time to test the engine to ensure it is functioning properly. Start by checking the ignition system, making sure that the spark plugs are in good condition and the wires are securely connected. Test the engine’s compression by using a compression tester. Additionally, examine the carburetor and fuel system to ensure proper fuel flow. This thorough inspection and testing process will help ensure that your newly painted dirt bike engine is ready to perform at its best.
Frequently Asked Questions On How To Paint A Dirt Bike Engine
Can You Paint A Dirt Bike Motor?
Yes, you can paint a dirt bike motor for a fresh look and added protection.
What Paint Do You Use To Paint A Motorcycle Engine?
The paint used to paint a motorcycle engine is typically high-temperature enamel or ceramic engine paint.
What Paint To Use On Engine?
For painting an engine, use high-temperature engine enamel paint.
Is It Ok To Paint Your Engine?
Yes, it is generally acceptable to paint your engine for aesthetic purposes and to protect it from corrosion.
Conclusion
Painting a dirt bike engine can be a fun and rewarding project that not only enhances its appearance but also extends its durability. By following the steps outlined in this blog post, you can successfully prep, prime, paint, and protect your engine to ensure it looks great and withstands the wear and tear of off-road adventures.
Remember to choose the right paint, properly clean and degrease the engine, and apply thin, even coats for the best results. Additionally, taking the time to properly protect and cure the paint will ensure its longevity. Whether you’re a seasoned dirt bike enthusiast or new to the world of motorcycle maintenance, this guide has provided you with the knowledge and tips needed to confidently tackle this DIY project.
So go ahead, give your dirt bike engine a fresh new look and enjoy the sense of accomplishment that comes with a job well done!