To clean a dirt bike helmet, first, remove the padding and wash it separately. Then, use a mild soap and warm water to clean the exterior and interior of the helmet.
After that, rinse thoroughly and let it air dry.

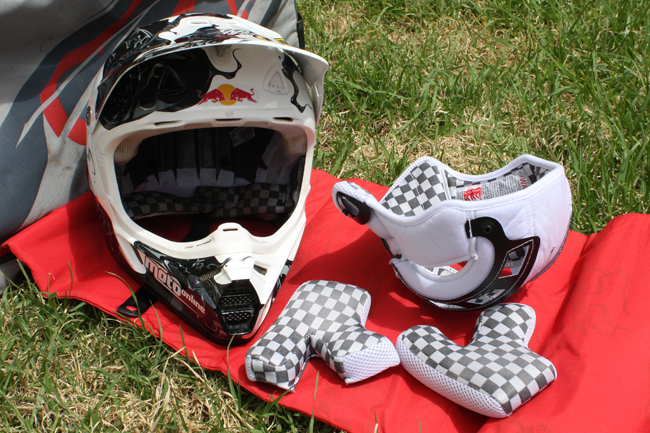
Credit: www.cardosystems.com
How to Clean a Dirt Bike Helmet: Step by Step Guide
Preparing For Cleaning
In order to clean a dirt bike helmet effectively, it is important to start by inspecting the helmet for any signs of damage. Look for any cracks, dents, or loose parts that may require repair before cleaning. Gathering the necessary cleaning supplies will ensure you have everything you need for the task at hand.
You will need mild soap or helmet cleaner, warm water, a soft cloth or sponge, and a gentle brush for more stubborn dirt. Before cleaning, it is recommended to remove any detachable parts and accessories such as visors or liners. This will make it easier to clean each component thoroughly. By following these steps, you can ensure a proper and thorough clean for your dirt bike helmet.
Cleaning The Exterior Of The Helmet
When it comes to cleaning the exterior of your dirt bike helmet, it is important to remove any dirt and debris that may have accumulated. Start by washing the helmet with mild soap and water to get rid of general dirt and grime. Use a soft cloth or sponge to gently scrub the surface, making sure to pay attention to any stubborn stains or marks.
For tougher stains, you can use an appropriate cleaner or spot treatment. It is essential to avoid using harsh chemicals or abrasive materials that could damage the helmet’s exterior or protective coating. Remember to rinse the helmet thoroughly after cleaning to remove any leftover soap or cleaner residue. By following these steps, you can keep your dirt bike helmet clean and in good condition for years to come.
Cleaning The Interior Of The Helmet
Removing the padding and liners
To clean the interior of your dirt bike helmet, start by removing the padding and liners. This is an important step as it allows you to thoroughly and effectively clean every nook and cranny of the interior.
Washing the padding and liners
Once you have removed the padding and liners, you can proceed to wash them. Gently hand wash them using a mild detergent and lukewarm water. Avoid using harsh chemicals or excessive force as it may damage the materials.
Drying and reassembling the interior components
After washing, make sure to properly dry the padding and liners before reassembling them into the helmet. Allow them to air dry naturally in a well-ventilated area. Once dry, reinsert them into the helmet in their original positions.
Cleaning The Visor/Mask
When it comes to cleaning your dirt bike helmet, it is important to pay special attention to the visor or mask. Removing the visor/mask is the first step in the cleaning process. To do this, start by locating the screws or clips that hold it in place. Gently unscrew or unclip them, being careful not to apply too much force.
Once the visor/mask is removed, it’s time to clean it without scratching the surface. Use a mild soap or helmet cleaner and a soft cloth to gently wipe away any dirt and grime. Avoid using harsh chemicals or abrasive materials that could damage the visor/mask.
After cleaning, make sure to reattach the visor/mask securely. Align the screw holes or clips with the corresponding slots on the helmet and carefully tighten the screws or clip them back into place.
By following these steps, you can effectively clean your dirt bike helmet visor/mask without causing any damage. Remember to always read the manufacturer’s instructions for specific cleaning guidelines for your helmet.
Cleaning The Ventilation System
Cleaning the ventilation system of your dirt bike helmet is an essential part of maintaining its effectiveness and extending its lifespan. One important aspect of this process is inspecting and cleaning the ventilation ports.
- Inspecting and cleaning the ventilation ports:
- Clearing obstructions and debris from vents:
- Ensuring proper airflow after cleaning:
Inspect the ventilation ports for any dirt, dust, or debris that may be blocking them. Using a soft brush or compressed air, carefully remove any obstructions to ensure proper airflow through the vents.
After clearing the obstructions, thoroughly clean the ventilation ports with a mild soap and water solution. Use a soft cloth or sponge to gently scrub away any dirt or grime that may have accumulated. Rinse the vents thoroughly and allow them to air dry before reassembling the helmet.
Proper airflow is crucial for comfort and safety while riding. Before using the helmet again, ensure that all ventilation ports are clear and unobstructed, allowing for optimal airflow during your dirt bike adventures.
Maintaining The Helmet’S Integrity
Regularly checking your dirt bike helmet for cracks or damage is crucial to ensure its continued effectiveness in protecting your head. Inspection of the helmet should be done carefully and thoroughly to identify any signs of wear or compromise. Look for cracks, dents, or any visible damage on the surface of the helmet.
If any damage is detected, it’s important to address it immediately. Damaged components should be repaired or replaced to maintain the integrity of the helmet. This includes items such as the visor, chin strap, padding, or any other part that may have suffered damage.
When not in use, proper storage of your dirt bike helmet is essential to keep it in the best condition possible. Ensure that the helmet is stored in a cool, dry place away from direct sunlight or extreme temperatures. Use a helmet bag or a dedicated helmet storage area to protect it from dust or accidental damage.
Frequently Asked Questions Of How To Clean A Dirt Bike Helmet
How Often Should I Clean My Dirt Bike Helmet?
It is recommended to clean your dirt bike helmet after every ride to remove dirt, sweat, and bacteria buildup. Regular cleaning helps maintain the helmet’s integrity, improves hygiene, and ensures optimum performance and comfort.
What Supplies Do I Need To Clean My Dirt Bike Helmet?
To clean your dirt bike helmet, you’ll need mild soap or helmet-specific cleaner, warm water, a soft cloth or sponge, and a helmet drying rack. Avoid using harsh chemicals or abrasive materials that could damage the helmet’s surface or padding.
Can I Put My Dirt Bike Helmet In The Washing Machine?
No, you should never put your dirt bike helmet in a washing machine. The washing machine’s agitator can damage the helmet’s structure, foam padding, or shell. Instead, use a gentle handwashing technique with mild soap and water to clean your helmet properly.
How Do I Clean The Visor Of My Dirt Bike Helmet?
To clean the visor of your dirt bike helmet, use a soft, lint-free cloth or microfiber towel dampened with water. Gently wipe the visor in a circular motion to remove dirt, bugs, or debris. Avoid using harsh chemicals or rough materials that can scratch or damage the visor.
Conclusion
Regularly cleaning your dirt bike helmet is essential not only for its longevity but also for your safety. By following simple steps like removing the visor, scrubbing the inside and outside, and ensuring proper drying, you can maintain a clean and hygienic helmet.
So, keep your dirt bike helmet clean and enjoy a safe and enjoyable ride every time!