To lower a dirt bike suspension, adjust the sag and preload settings. This will help you achieve the desired height and improve handling on the bike.
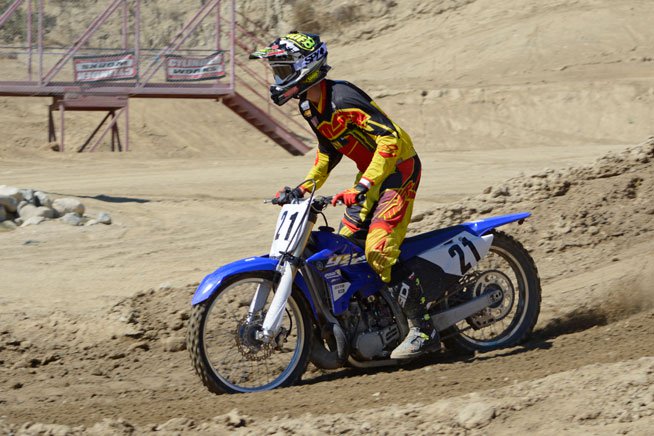
Riding a dirt bike with the right suspension height is crucial for a smooth and controlled off-road experience. Whether you’re a beginner or an experienced rider, getting the suspension right can make a significant difference in your ability to maneuver the bike effectively on different terrains.
Lowering the suspension can improve your confidence and comfort, allowing you to tackle obstacles and corners with ease. We will guide you through the process of lowering your dirt bike suspension to customize it according to your needs and preferences. So let’s get started and make your suspension work for you.

Credit: www.motolabdirtbikes.com
Determining If Lowering Your Dirt Bike Suspension Is Necessary
Lowering the suspension of your dirt bike can have a significant impact on your riding experience, making it easier to handle and control. However, deciding whether or not to lower your bike’s suspension is a crucial decision that should not be taken lightly. In this section, we will explore the signs that indicate the need for lowering, how analyzing your riding style and terrain can help, and the importance of maintaining suspension balance.
Signs that indicate the need for lowering
Recognizing the signs that your dirt bike suspension may need to be lowered is the first step towards improving your riding experience. Here are some of the key indicators to look out for:
- Difficulty reaching the ground: If you struggle to touch the ground with both feet while sitting on your bike, it may be a sign that your suspension is too high. This can affect your stability and control, especially when navigating challenging terrain.
- Unstable handling: Does your bike feel wobbly or unstable when riding? A suspension that is set too high can cause excessive weight transfer and affect your bike’s ability to maintain balance, making it harder to handle corners or rough terrain.
- Increased discomfort: Experiencing excessive jolts and discomfort while riding can be an indication that your suspension is not suited to your height or riding style. Lowering the suspension can help to absorb shocks and improve overall ride comfort.
Analyzing your riding style and terrain
Each rider’s riding style and the terrain they predominantly ride on can greatly influence the decision to lower their bike’s suspension. Understanding how these factors interact is essential:
Consider the following:
- Riding position: Are you an aggressive rider who prefers to attack corners and jumps? Or do you enjoy a more controlled and relaxed approach? Your riding style can affect how your suspension responds and the optimal height for your bike.
- Terrain: The type of terrain you ride on plays a significant role in determining suspension requirements. Riding on rough, rocky trails may require a lower suspension to increase stability, whereas riding on smoother tracks might not necessitate lowering.
- Adaptability: Are you willing to adapt your riding style and bike setup to accommodate changes in suspension height? Lowering your suspension may require adjustments to other components such as the handlebars and footpegs, so it’s important to consider the overall impact on your riding experience.
Importance of maintaining suspension balance
While it may be tempting to focus solely on lowering your bike’s suspension to improve stability or reach the ground more comfortably, it is essential to maintain suspension balance. Suspension balance refers to achieving harmony between the front and rear suspension systems.
Why is suspension balance important?
- Handling: A well-balanced suspension setup ensures that both the front and rear of your bike work together harmoniously, providing optimal handling and control. It helps reduce the risk of unpredictable behavior during acceleration, braking, and cornering.
- Safety: Balanced suspension prevents excessive weight transfer, minimizing the risk of losing control or experiencing a sudden loss of traction. This is particularly important when navigating challenging or unpredictable off-road conditions.
- Durability: By maintaining suspension balance, you can reduce stress on individual suspension components, improving their longevity and reducing the likelihood of premature wear or failure.
Now that you understand the signs that indicate the need for lowering, how analyzing your riding style and terrain can help, and the importance of maintaining suspension balance, you can make an informed decision about whether or not to lower your dirt bike’s suspension. Remember to consult with a professional or experienced rider if you are unsure about making any adjustments to your bike.
Preparing For The Suspension Lowering Process
Lowering a dirt bike’s suspension can have several benefits, such as improving stability and increasing rider confidence. However, it’s crucial to approach the process with the right knowledge and tools. In this article, we will guide you through the steps of preparing for the suspension lowering process, ensuring a safe and successful modification.
Required Tools and Equipment
Before you start working on lowering your bike’s suspension, make sure you have the necessary tools and equipment ready. Here is a list of items you’ll need:
| Tools | Equipment |
|---|---|
|
|
Having these tools and equipment handy will ensure that you can work efficiently and safely throughout the suspension lowering process.
Safety Precautions before Starting
Prioritize your safety by taking the following precautions before you begin working on your dirt bike’s suspension:
- Ensure you are wearing appropriate protective gear, including a helmet, boots, gloves, and body armor.
- Perform the suspension lowering process in a well-lit and spacious area, preferably a garage or workshop.
- Secure your dirt bike on a motorcycle lift or stands to provide a stable and elevated working platform.
- Refer to the shop manual for your specific dirt bike model to understand the manufacturer’s recommendations and specifications for suspension adjustments.
- Double-check that all the tools and equipment are in good working condition and properly sized for the task.
- Work methodically and give yourself enough time to complete the suspension lowering process without rushing.
- If you’re unsure about any step, seek the assistance of an experienced mechanic or consult reputable online resources for guidance.
Following these safety precautions will minimize the risk of accidents and ensure that the suspension lowering process goes smoothly.
Understanding Your Dirt Bike’s Suspension Components
Before you start lowering your dirt bike’s suspension, it’s essential to have a good understanding of the various components involved. Familiarize yourself with the following key elements:
- Front forks: These are the two long tubes connected to the front wheel. They house the springs and damping mechanisms.
- Rear shock: Located near the rear wheel, the shock absorber is responsible for absorbing impacts and providing a smooth ride.
- Preload adjustment: Many dirt bikes have preload adjustment capabilities. This allows you to adjust the tension on the springs to match your weight and riding style.
- Compression and rebound adjustments: Some high-end suspension systems offer compression and rebound adjustment, which allow you to fine-tune the suspension’s response to different terrain.
By understanding these suspension components, you’ll have a better grasp of how the modifications will affect your dirt bike’s performance.
In conclusion, properly preparing for the suspension lowering process is crucial to ensure a safe and effective modification. Make sure you have the required tools and equipment, follow the necessary safety precautions, and familiarize yourself with your dirt bike’s suspension components. Once you have completed these preparations, you’ll be ready to move on to the next steps of lowering your dirt bike’s suspension.
How to Lower a Dirt Bike Suspension: Step by Step Guide
Lowering the suspension of your dirt bike can greatly improve your riding experience, especially if you’re on the shorter side. Lowering the bike’s suspension will give you better control and allow you to reach the ground more comfortably. In this step-by-step guide, we will walk you through the process of lowering your dirt bike suspension, ensuring that you can easily follow along and achieve a more comfortable ride.
Step 1: Measuring the current ride height
The first step in lowering your dirt bike suspension is to measure the current ride height. This will give you a baseline to work with and help you determine how much you need to lower the bike. To measure the ride height, follow these steps:
- Park the bike on a level surface and ensure it is in a upright position.
- Measure the distance from the ground to a fixed point on the bike’s frame, such as the bolt at the rear axle.
- Write down the measurement and keep it for reference.
Step 2: Adjusting sag and preload settings
Sag and preload settings play a vital role in determining the ride height and overall performance of your dirt bike. By adjusting these settings, you can effectively lower the suspension. Here’s how to do it:
- Begin by adjusting the sag, which is the amount the suspension compresses under the weight of the rider. Refer to your bike’s manual for the recommended sag setting specific to your model.
- Next, adjust the preload settings, which control the stiffness of the suspension. Reduce the preload to allow for more compression and lower the ride height.
Step 3: Changing fork height or shortening shock length
If adjusting the sag and preload settings is not enough to achieve the desired ride height, you may need to consider changing the fork height or shortening the shock length. Here’s what you need to do:
- To lower the front end, you can slide the fork tubes up in the triple clamps. Make sure to loosen the bolts and readjust the handlebar position if needed.
- To lower the rear end, you will need to shorten the shock length. This can be done by adjusting the shock’s preload collar or installing a shorter shock.
Step 4: Installing lowering links or plates
If further lowering is required, you can install lowering links or plates. These aftermarket components are specifically designed to reduce the ride height of your dirt bike. Follow these steps for installation:
- Consult the instructions provided with the lowering links or plates to understand the installation process.
- Ensure you have the necessary tools and hardware to secure the components properly.
- Remove the existing suspension linkage or plates according to the manufacturer’s instructions.
- Install the lowering links or plates in their place, making sure they are aligned correctly and securely tightened.
Step 5: Adjusting rebound and damping settings
Now that you have successfully lowered your dirt bike suspension, it’s important to fine-tune the rebound and damping settings to ensure optimal performance and control. Here’s what you need to do:
- Refer to your bike’s manual for the recommended rebound and damping settings.
- Make small adjustments to the settings and test the bike’s performance after each adjustment.
- Find the sweet spot where the bike feels balanced, handles well, and provides a comfortable ride.
By following these step-by-step instructions, you can safely and effectively lower your dirt bike suspension to achieve a more comfortable and controlled riding experience. Remember to always refer to your bike’s manual and seek professional guidance if needed.
Testing And Fine-Tuning The Lowered Suspension
Once you have successfully lowered the suspension of your dirt bike, it’s time to test and fine-tune it to ensure optimal performance and handling. This crucial step will help you assess how your bike responds to the adjustment and make any necessary additional modifications. In this section, we will walk you through the testing process and provide guidance on how to make further adjustments if needed.
Step 1: Taking your dirt bike for a test ride
Before diving into assessing the handling and stability of your dirt bike, you need to take it for a test ride. Find a suitable terrain, whether it’s a trail, track, or even an open field, where you can safely push your bike to its limits. By going on a test ride, you’ll be able to observe how the bike performs after lowering the suspension and get a feel for any potential issues that may arise.
Step 2: Assessing the bike’s handling and stability
During your test ride, pay close attention to how your bike handles and maintains stability. Here are a few key factors to consider:
- Cornering: Determine if your dirt bike feels more agile and responsive while taking corners. Is it easier to lean into turns without any unwanted pitching or instability?
- Jumping: Take note of how the bike behaves during jumps. Does it maintain good balance and stability upon landing? Are there any sudden jolts or excessive bouncing?
- Braking: Test the effectiveness of your brakes and observe if there are any changes in stopping distance or stability.
- Overall comfort: Pay attention to how the bike feels overall. Does it provide a smooth and comfortable ride, or do you experience any excessive vibrations or discomfort?
Step 3: Making additional adjustments if needed
After assessing your dirt bike’s handling and stability, it’s time to make any necessary additional adjustments. Keep in mind that achieving the perfect suspension setup may require some trial and error. These adjustments can include:
- Tweaking the sag: If you notice that the bike feels too soft or hard, adjust the sag accordingly. This involves adjusting the preload on the shock or fork to achieve the desired compression and rebound.
- Fine-tuning compression and rebound: If your bike requires further fine-tuning, you can make adjustments to the compression and rebound damping settings. This will help control the bike’s response to bumps and impacts.
- Considering other factors: It’s important to take into account other factors that may affect your bike’s performance, such as tire pressure and suspension linkage. Make sure these elements are properly adjusted and maintained.
By meticulously testing and fine-tuning your lowered suspension, you’ll be able to find the optimal setup that enhances your bike’s performance, handling, and overall riding experience. Remember to always prioritize safety and consult your bike’s manual or a professional if you are unsure about making adjustments.
Tips For Maintaining And Caring For A Lowered Suspension
Regular Inspection of Suspension Components
Regularly inspecting the suspension components of your dirt bike is crucial to maintaining its performance and longevity. By keeping a close eye on these parts, you can catch any issues early on and prevent them from causing further damage. Here are a few key components to inspect:
- Forks: Check for any leaks, damage, or excessive wear on the fork tubes and seals. Ensure they are properly aligned and move smoothly.
- Shock absorber: Inspect the shock absorber for leaks, cracks, or worn-out bushings. Also, check the rebound and compression settings to ensure they are adjusted correctly.
- Linkage and swingarm: Look for any loose or worn-out bolts on the linkage and swingarm. Check for excessive play or binding in these areas as well.
- Bearings: Check all the bearings in the suspension system for proper lubrication and smooth rotation. Replace any worn-out or damaged bearings as needed.
Performing a thorough inspection of these components on a regular basis will help you identify any potential issues and address them promptly, ensuring your lowered suspension system functions optimally.
Lubrication and Cleaning of the Suspension System
Proper lubrication and cleaning of your dirt bike’s suspension system are essential for maintaining its performance and preventing premature wear. Here are a few tips to keep in mind:
- Use a high-quality suspension fork oil to lubricate the fork tubes. Refer to your bike’s manual for the recommended oil viscosity and change interval.
- Clean the fork tubes regularly using a mild detergent or specialized cleaner. Remove any dirt, mud, or debris that could potentially damage the seals or affect the suspension’s performance.
- Inspect and lube the shock absorber linkage regularly. Apply a suitable grease to the bearings and joints to ensure smooth operation.
- Keep an eye on the air filter and clean it regularly to prevent dust and debris from entering the suspension system.
Regular maintenance of your bike’s suspension system will not only prolong its lifespan but also ensure optimal performance during your off-road adventures.
Maintaining Proper Air Pressure and Fluid Levels
Proper air pressure and fluid levels are vital for maintaining a well-functioning lowered suspension on your dirt bike. Here’s what you need to do:
- Check the air pressure in your forks and shock regularly, following the manufacturer’s recommendations. Adjust the pressure as needed to achieve the desired performance and ride comfort.
- Inspect the seals and dust wipers for any signs of leakage. If you notice any oil seeping out, have the seals replaced promptly to prevent further damage.
- Monitor the fluid levels in your suspension forks and shock absorber. Top up or replace the fluids according to the manufacturer’s guidelines.
- Ensure that the rebound and compression settings are adjusted according to your particular riding style and terrain conditions.
By maintaining proper air pressure and fluid levels in your bike’s suspension system, you’ll experience improved control, better handling, and a safer off-road riding experience.
Common Mistakes To Avoid When Lowering A Dirt Bike Suspension
Lowering the suspension on a dirt bike can significantly improve the riding experience for those who find it challenging to touch the ground comfortably. However, like any modification, there are common mistakes that riders should avoid to ensure their safety and maintain the bike’s overall performance. This article will discuss three critical mistakes that riders often make when lowering a dirt bike suspension.
Over-lowering the suspension
One of the most common mistakes riders make when lowering a dirt bike suspension is over-lowering it. Lowering the suspension too much can have detrimental effects on the bike’s handling and stability, making it unpredictable and unsafe to ride.
To avoid this mistake, it is important to follow the manufacturer’s guidelines or consult a professional who has expertise in dirt bike suspension modifications. Remember, achieving the right balance between comfort and performance is key to a successful suspension modification.
Ignoring the necessary adjustments for balance
Another mistake that riders often make when lowering a dirt bike suspension is ignoring the necessary adjustments for balance. Lowering the bike’s suspension alters its geometry and can affect its weight distribution. Failure to address these adjustments can lead to imbalanced handling, decreased cornering ability, and potential loss of control.
It is crucial to consider factors such as fork and shock spring rates, sag, and rebound to ensure a well-balanced and safe ride. Always consult the manufacturer’s instructions or seek professional guidance when making suspension modifications.
Failing to consult a professional if unsure
Lastly, a mistake that should be avoided at all costs is failing to consult a professional if unsure about lowering the dirt bike suspension. Suspension modifications require technical knowledge and expertise, and making incorrect adjustments can have serious consequences.
A professional can assess your specific requirements, provide guidance on proper suspension lowering techniques, and ensure that the bike’s performance and safety are not compromised. Don’t hesitate to reach out to an experienced mechanic or suspension specialist who can help you achieve the desired results without compromising your safety.
Avoiding these common mistakes will ensure that your dirt bike suspension modification goes smoothly, optimizing your riding experience without compromising safety or performance. Always remember, when it comes to modifying your bike’s suspension, it’s better to be safe than sorry!
Frequently Asked Questions
When it comes to dirt bike suspensions, riders often wonder about the possibility of lowering them. Lowering a dirt bike suspension can have its advantages, but it is important to address some frequently asked questions to make an informed decision.
Are there any drawbacks to lowering a dirt bike suspension?
Lowering a dirt bike suspension can provide several benefits such as improved stability, better control, and increased confidence for shorter riders. However, it is essential to consider the potential drawbacks as well. Lowering the suspension can compromise ground clearance, making the bike susceptible to scraping on bumpy or uneven terrains. Additionally, altering the suspension’s height may impact the bike’s overall handling and maneuverability.
Can a dirt bike suspension be lowered permanently?
Yes, a dirt bike suspension can be permanently lowered, but it is recommended to consult a professional technician or suspension specialist before making any permanent modifications. Lowering the suspension permanently involves adjusting the forks and shock absorbers to lower the bike’s ride height. This process requires expertise and knowledge to ensure that the modifications are made correctly and do not compromise the bike’s performance and safety.
Will lowering the suspension affect the bike’s performance?
Lowering the suspension can have an impact on the bike’s performance. By lowering the bike’s ride height, the center of gravity shifts, which can result in improved stability and better cornering for some riders. However, it is important to note that lowering the suspension may also affect the bike’s suspension travel and overall handling.
The bike may feel stiffer due to reduced suspension travel, and it may not be as responsive in absorbing impacts from jumps or rough terrains. It is crucial to consider these factors and test the bike’s performance after lowering the suspension to ensure it suits your riding style and preferences.
In conclusion, before making a decision to lower your dirt bike suspension, it is essential to weigh the pros and cons, consult a professional if necessary, and consider your specific riding needs and preferences. Lowering the suspension can provide benefits for some riders, but it is crucial to be aware of the potential drawbacks and how they may impact your bike’s performance.
Frequently Asked Questions For How To Lower A Dirt Bike Suspension
Does Lowering A Dirt Bike Affect Handling?
Lowering a dirt bike can affect its handling, potentially making it more stable at slower speeds.
How Much Does It Cost To Lower A Dirtbike?
Lowering a dirtbike cost varies depending on the make, model, and the specific method chosen.
Can You Lower Front Forks On Dirt Bike?
Yes, you can lower the front forks on a dirt bike for improved handling and stability.
How Do You Lower Motocross Forks?
To lower motocross forks, first, find the preload adjusters on top of the forks. Turn them counterclockwise to decrease the height.
Conclusion
To summarize, lowering your dirt bike suspension is a useful modification that can greatly improve your riding experience. By following the step-by-step process outlined in this blog post, you can confidently adjust your suspension to your liking. Whether you’re a beginner looking to increase your confidence or an experienced rider wanting to fine-tune your bike’s performance, lowering the suspension can help you achieve your goals.
Remember to take precise measurements, make gradual adjustments, and test your bike’s performance after each adjustment. Additionally, don’t hesitate to seek professional advice or assistance if you’re unsure about any aspect of the process. With a properly lowered suspension, you’ll experience better control, improved handling, and increased comfort on your dirt bike adventures.
Happy riding!