To test a dirt bike coil, you will need a multimeter and the dirt bike’s service manual.
Understanding The Significance Of Testing A Dirt Bike Coil
Understanding the Significance of Testing a Dirt Bike Coil
Proper maintenance and regular testing of a dirt bike coil is vital for the optimal performance of your bike. A malfunctioning coil can lead to various issues, such as poor starting, decreased power, and even engine misfires. Therefore, it is crucial to understand the significance of testing a dirt bike coil in order to ensure a smooth and enjoyable ride.
Importance of a properly functioning dirt bike coil
A dirt bike coil plays a critical role in the ignition system of your bike. It is responsible for generating the high voltage required to ignite the fuel mixture in the combustion chamber. A properly functioning coil ensures a strong and consistent spark, resulting in efficient combustion and optimal engine performance.
Signs of a malfunctioning dirt bike coil
Identifying the signs of a malfunctioning dirt bike coil is essential to prevent potential issues before they escalate. Some common symptoms of a faulty coil include:
- Inconsistent or weak spark: A weak spark or irregular sparking can be an indicator of a failing coil. This can lead to difficulty starting the bike or poor throttle response.
- Stalling or misfiring: If your dirt bike frequently stalls or misfires during acceleration, it may be due to an insufficient spark from a faulty coil.
- Overheating: A malfunctioning coil can lead to excessive heat buildup, potentially causing damage to other components in the ignition system.
- Increased fuel consumption: A weak spark produced by a failing coil can result in incomplete combustion, leading to increased fuel consumption.
Why testing the dirt bike coil is necessary
Regularly testing your dirt bike coil is necessary to ensure its proper functioning. By testing the coil, you can:
- Identify any potential issues with the coil before they cause more significant problems or damage to other components.
- Ensure that the coil is generating the required voltage for a strong and consistent spark.
- Verify the integrity of the coil’s wiring connections, ensuring there are no loose or damaged connections that could affect its performance.
- Diagnose any other ignition system issues that may be contributing to poor performance or starting problems.
Testing a dirt bike coil is a relatively straightforward process and can be done using a digital multimeter. By following the manufacturer’s instructions and performing regular tests, you can maintain the proper functioning of your dirt bike coil and enjoy a reliable and powerful ride.
Remember, a well-maintained and properly functioning coil is crucial for the overall performance and longevity of your dirt bike. Don’t overlook the significance of testing your dirt bike coil regularly – it can save you from unnecessary breakdowns and ensure a smooth riding experience.
Equipment Needed For Testing A Dirt Bike Coil
Testing the coil on your dirt bike is a crucial step in diagnosing any ignition issues you might be experiencing. By understanding how to effectively test and troubleshoot the coil, you can save time and money by pinpointing the problem and avoiding unnecessary repairs. To successfully test the dirt bike coil, you will need specific equipment. Let’s take a look at the essential tools you will need to perform the test.
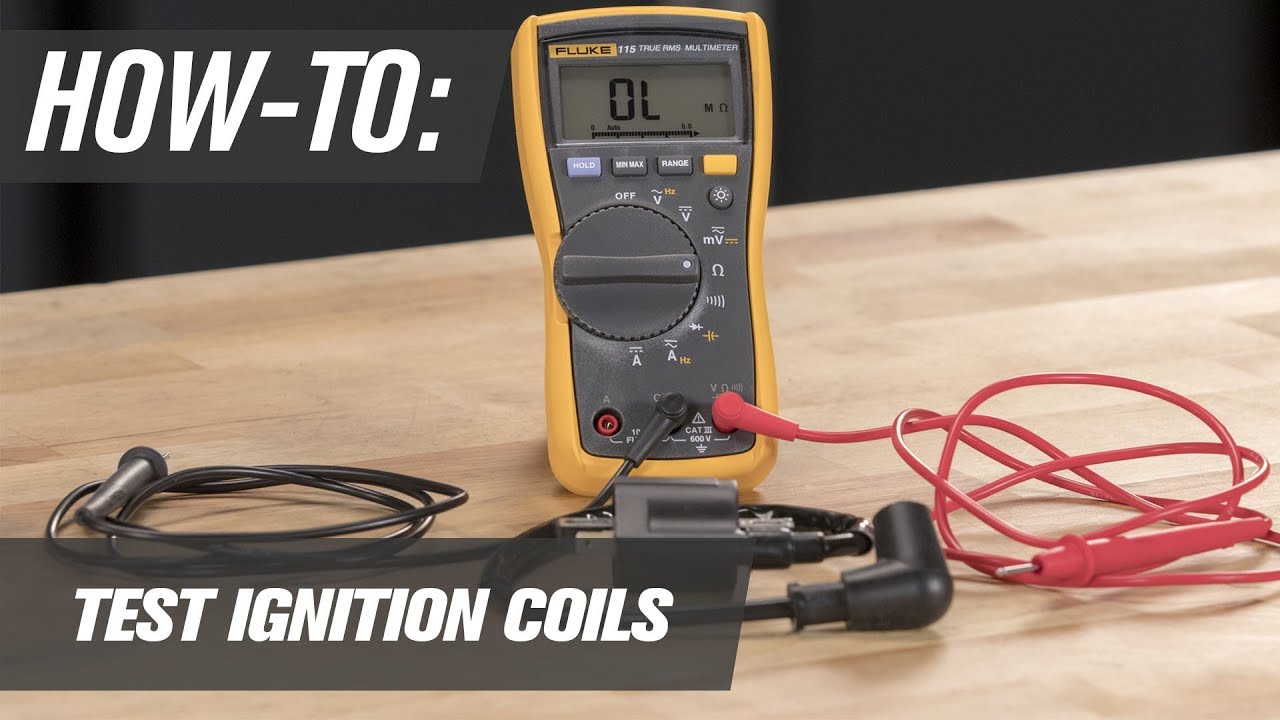
Multimeter: An essential tool for testing the coil
A multimeter is a versatile electronic device that measures voltage, current, and resistance in an electrical circuit. In the case of testing a dirt bike coil, a multimeter is an essential tool since it allows you to measure the resistance of the coil’s primary and secondary windings. By measuring the resistance, you can determine if the coil is functioning within the manufacturer’s specifications or if it needs to be replaced. When purchasing a multimeter, make sure it has a resistance measurement setting and is capable of measuring ohms.
Additional tools required for the testing process
In addition to a multimeter, there are a few other tools you will need to properly test a dirt bike coil. These tools ensure that the testing process is accurate and efficient. Here are the additional tools required:
- A set of screwdrivers: You will need a set of screwdrivers to remove the coil from the dirt bike. Make sure to have both flathead and Phillips head screwdrivers, as different dirt bike models may require different screw types to remove the coil.
- A spark plug tester: This tool allows you to check if the coil is producing a strong and consistent spark. By connecting the spark plug tester to the coil’s secondary wire and grounding it on the engine, you can visually inspect the spark and determine its quality.
- A service manual: While not necessarily a physical tool, a service manual is an invaluable resource when testing a dirt bike coil. It provides step-by-step instructions specific to your dirt bike model, making the testing process more accessible and accurate.
By having these tools ready and in hand, you are well-prepared to test the coil on your dirt bike effectively. Remember to follow the manufacturer’s instructions and safety precautions when handling electrical components. With proper testing, you can diagnose and resolve ignition issues, ensuring your dirt bike performs at its best.
Step-By-Step Process: How to Test a Dirt Bike Coil
When it comes to troubleshooting issues with your dirt bike, testing the coil is an essential step. A faulty coil can lead to a weak spark or no spark at all, which can affect the bike’s performance. In this guide, we will walk you through the step-by-step process for testing a dirt bike coil to help you identify any potential problems. By following these easy steps, you can determine whether the coil needs to be replaced, ensuring your dirt bike is running smoothly.
Preparing the dirt bike for testing the coil
Before you begin testing the coil, it is crucial to ensure your dirt bike is prepared for the process. Here are a few steps to get started:
- Make sure the dirt bike is on a flat and stable surface.
- Disconnect the spark plug wire to eliminate the risk of accidental sparking.
- If your dirt bike has been running recently, allow it to cool down completely to avoid any potential burns.
Locating the dirt bike coil
The next step is to locate the dirt bike coil. The coil is typically found near the engine, connected to the spark plug wire. Refer to your dirt bike’s owner manual or follow these general guidelines:
- Identify the ignition system of your dirt bike.
- Trace the spark plug wire from the spark plug to the source.
- Look for a component resembling a small cylinder or box connected to the spark plug wire.
Disconnecting the dirt bike coil
Once you have located the coil, it’s important to disconnect it from the ignition system before testing. Follow these steps:
- Identify the wire harness or plugs that connect the coil to the ignition system.
- Use your hand or an appropriate tool to carefully disconnect the wire harness or plugs.
Setting up the multimeter for testing
Now it’s time to set up the multimeter for testing. This will help measure the resistance of the coil. Follow these guidelines:
- Ensure the multimeter is set to the resistance or ohms (Ω) function.
- Connect the test leads to the proper ports, following the manufacturer’s instructions.
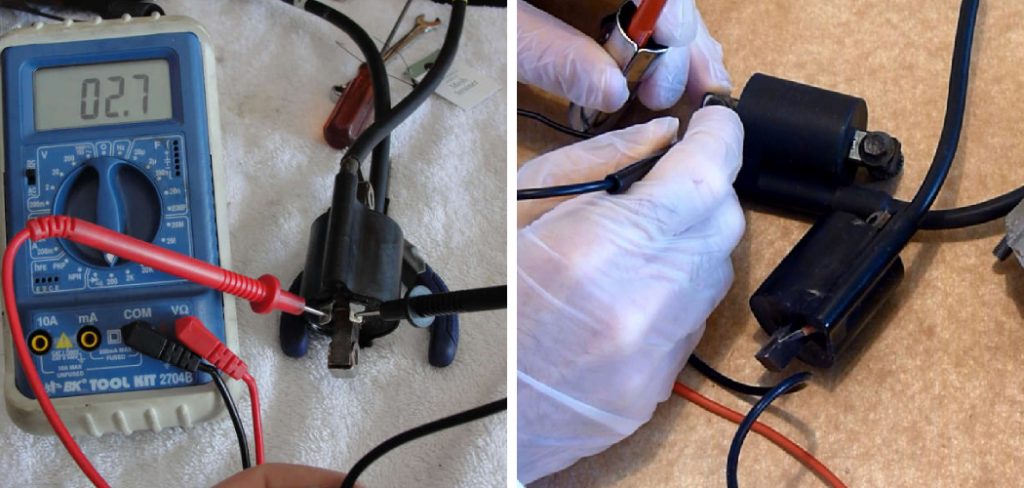
Measuring the resistance of the coil
With the multimeter properly set up, you can now measure the resistance of the coil. Follow these steps:
- Connect one test lead of the multimeter to the primary terminal of the coil.
- Connect the other test lead to the secondary terminal of the coil.
Interpreting the test results
After taking the resistance measurement, interpreting the test results is essential to determine whether the coil is functioning properly. Here’s what to look for:
| Resistance Value | Interpretation |
|---|---|
| Within the specified range | The coil is functioning correctly. |
| No reading or infinite resistance | The coil is faulty and needs to be replaced. |
Testing the primary and secondary windings separately
In some cases, it may be necessary to test the primary and secondary windings of the coil individually. Follow these steps:
Testing the Primary Winding:
- Disconnect the test leads from the secondary terminal.
- Connect one test lead to the positive terminal of the multimeter.
- Connect the other test lead to the primary terminal of the coil.
- Check the resistance value displayed on the multimeter.
Testing the Secondary Winding:
- Disconnect the test leads from the primary terminal.
- Connect one test lead to the positive terminal of the multimeter.
- Connect the other test lead to the secondary terminal of the coil.
- Check the resistance value displayed on the multimeter.
Replacing the coil if necessary
If the coil fails any of the resistance tests or shows indications of a fault, it’s time to replace it. Ensure you follow the manufacturer’s instructions or seek professional assistance in selecting and installing a new coil. Remember, a properly functioning coil is crucial for optimal dirt bike performance.
Common Issues And Troubleshooting Tips
When it comes to dirt bike coils, understanding common issues and troubleshooting tips can save you time and money. A faulty ignition coil can lead to poor performance, misfires, and difficulty starting your bike. In this section, we will explore different resistance readings, potential causes of coil issues, and steps to take if the coil passes the test but performance problems persist.
Interpreting Different Resistance Readings
Testing the resistance of your dirt bike coil is a crucial step in troubleshooting. Using a multimeter, you can measure the electrical resistance to determine if the coil is functioning optimally. Here’s how to interpret different resistance readings:
| Resistance Reading Range | Interpretation |
|---|---|
| 0.1 – 1.0 ohms | This reading indicates a healthy coil with minimal resistance, meaning it is receiving and transmitting enough electrical energy. |
| No reading or infinite resistance | If there is no reading or infinite resistance, it suggests a broken coil, damaged wires, or poor connections. |
| Higher than 1.0 ohms | A resistance reading higher than 1.0 ohms can indicate excessive resistance, potentially compromising the coil’s performance. |
Identifying Other Potential Causes of Coil Issues
While a faulty ignition coil is a common cause of dirt bike performance problems, it is essential to consider other potential causes. Some other factors that can lead to similar symptoms include:
- Fuel delivery issues
- Spark plug problems
- Ignition timing concerns
- Electrical system malfunctions
To ensure an accurate diagnosis, it is necessary to rule out these potential causes before focusing solely on the dirt bike coil.
Steps to Take if the Coil Passes the Test, but Performance Problems Persist
If your dirt bike coil passes the resistance test, but you are still experiencing performance problems, try the following steps:
- Check the spark plug: Ensure it is clean, properly gapped, and functioning correctly.
- Inspect the fuel system: Verify fuel flow, filter condition, and carburetor settings to ensure the engine is receiving the right amount of fuel.
- Assess ignition timing: Confirm that the ignition timing is set correctly according to the manufacturer’s specifications.
- Examine the electrical system: Inspect the wiring connections, battery voltage, and other electrical components to identify any potential issues.
- Seek professional assistance: If all else fails, it may be time to consult a professional mechanic or technician who specializes in dirt bikes.
By following these troubleshooting steps, you can effectively identify coil issues and address other potential causes of poor dirt bike performance. Remember to take a systematic approach and consult experts when needed to keep your bike running smoothly.
Additional Tips For Maintaining A Dirt Bike Coil
Regular inspection and cleaning
Dirt bikes are exposed to various elements, including dirt, mud, and water, which can affect the performance of the coil. Regular inspection and cleaning are essential to ensure the coil remains in optimal condition. Start by visually inspecting the coil for any signs of dirt or debris buildup. If you notice any, gently remove the dirt using a soft brush or cloth. Avoid using any harsh chemicals or abrasive materials that may damage the coil.
To further clean the coil, you can use compressed air to blow away any remaining dirt or debris. Be sure to hold the nozzle a few inches away to prevent any damage. Additionally, check the wire connections for any loose or corroded terminals. Tighten or clean them as necessary to ensure proper electrical contact.
Protecting the coil from damage
The coil of a dirt bike is vulnerable to damage from various sources, including rocks, branches, and crashes. To protect the coil from such potential harm, consider installing a coil guard. A coil guard acts as a barrier, shielding the coil from impacts and preventing direct contact with any external objects. Make sure the guard you choose is compatible with your bike’s make and model and securely mount it to the bike frame.
Another way to protect the coil is by ensuring it is properly secured to the bike. Check the mounting brackets and hardware regularly to confirm they are in good condition. Replace any worn-out or damaged parts and tighten all bolts to prevent the coil from shifting during rides.
Other preventive measures for prolonging the coil’s lifespan
Aside from inspection, cleaning, and protection, there are other preventive measures you can take to extend the lifespan of your dirt bike coil. These measures include:
- Optimizing the bike’s suspension to reduce excessive vibration, which can strain the coil.
- Regularly inspecting the spark plug and ignition system to ensure they are functioning properly, as any issues in these areas can contribute to coil problems.
- Using dielectric grease on the coil connections to protect against moisture and corrosion.
- Keeping the bike’s electrical system properly grounded to provide consistent power flow to the coil.
By implementing these additional tips and following the regular maintenance routine, you can help prolong the lifespan of your dirt bike coil, ensuring it performs optimally for a longer period.
Frequently Asked Questions For How To Test A Dirt Bike Coil
How Do You Test A Bike Coil?
To test a bike coil, follow these steps: 1. Remove the spark plug wire from the coil. 2. Use a multimeter to measure the resistance between the coil terminals. 3. Compare the resistance reading with the manufacturer’s specifications. 4. If the resistance is outside the specified range, replace the coil.
Remember to always refer to the manufacturer’s guidelines for accurate testing.
How Do I Know If My Motorcycle Ignition Coil Is Bad?
Signs of a bad motorcycle ignition coil include difficulty starting, engine misfires, stalling, and weak or no spark.
Can You Test An Ignition Coil With A Multimeter?
Yes, you can test an ignition coil with a multimeter.
What Are The Symptoms Of A Bad Coil?
A bad coil can cause symptoms like misfiring, rough idling, poor fuel efficiency, and difficulty starting the engine.
Conclusion
Testing the coil of your dirt bike is an essential step in troubleshooting any ignition system problems. By carefully following the steps outlined in this guide, you can confidently determine whether your coil is functioning properly or needs to be replaced.
Start by gathering the necessary tools for the test, including a multi-meter and a spark plug tester. Then, begin the testing process by checking for continuity between the coil’s primary and secondary windings. Next, use the multi-meter to measure the resistance of the coil, ensuring it falls within the manufacturer’s specified range.
Finally, use the spark plug tester to check for a strong, consistent spark. By regularly testing your dirt bike coil and knowing how to interpret the results, you can keep your bike running smoothly and avoid unnecessary breakdowns. Happy riding!